Managing clusters and cluster groups↑
You can follow the steps in the following demo video or follow the the instructions in the following sections to use the various CAEPE features.
This guide shows you how to manage clusters and cluster groups from the CAEPE account portal. You can access the configuration section from the Configuration -> Clusters menu item.
Info
Clusters represent Kubernetes instances connected to your CAEPE account, and cluster groups are logical groups of clusters.
Viewing clusters↑
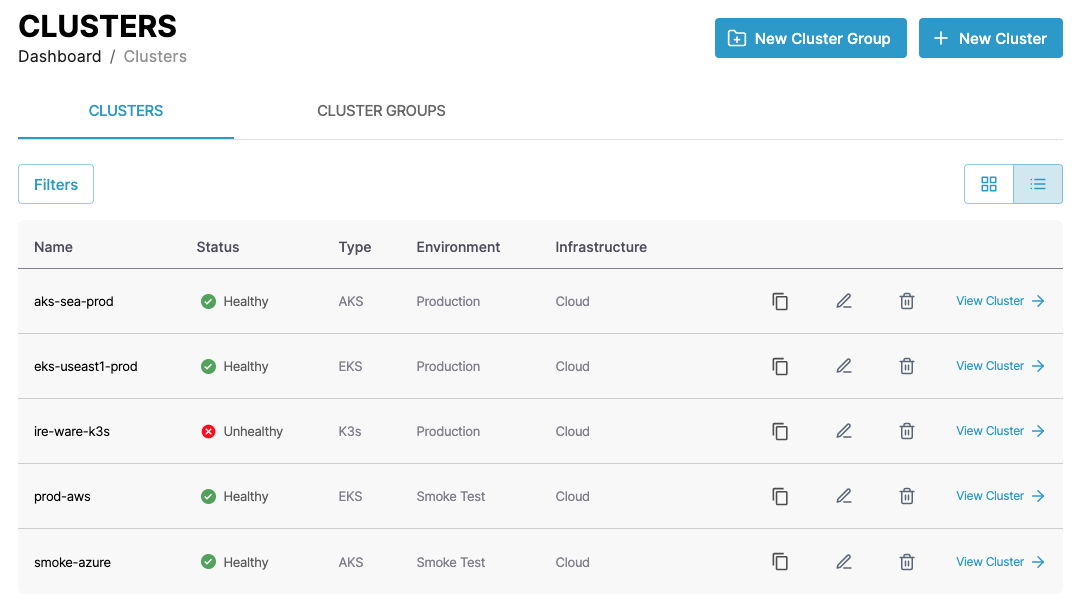
You can see the clusters associated with your account in the center of the page.
You can switch the view of the clusters between a "list" and "grid" view and filter the clusters by clicking the Filters button. You can filter by cluster name, status, and type.
For every cluster in the list, click the pencil icon to edit the cluster or the wastebasket icon to delete it.
Cluster details↑
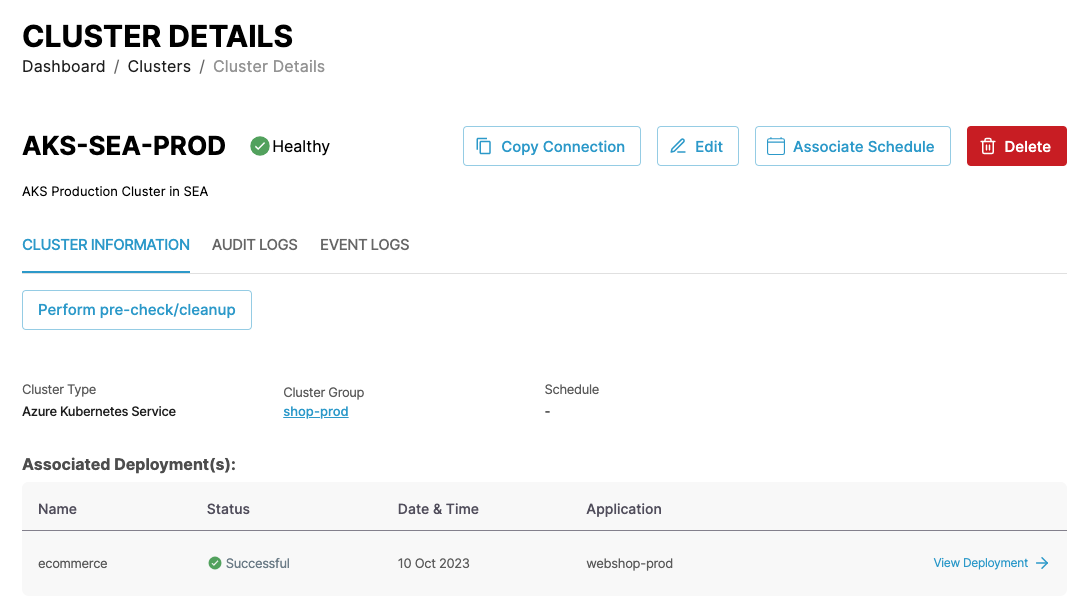
Click the View Cluster link next to any cluster to see more details about the cluster including the name, type, groups, connection details, and any past and present applications deployed to the cluster.
You can also create deployment schedules from the cluster details page and perform pre-checks or cleanup tasks on the cluster.
You can also edit and delete the cluster from the details page.
Viewing cluster groups↑
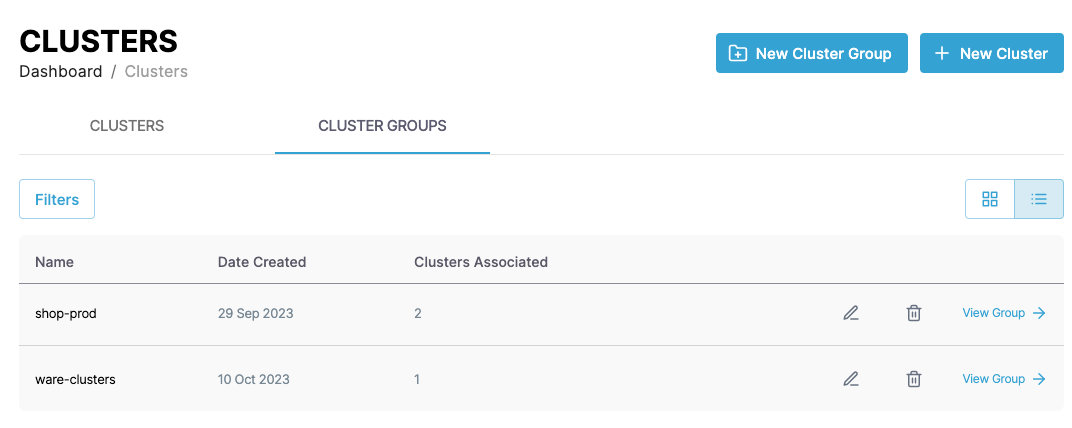
You can see the cluster groups associated with your account in the center of the page.
You can switch the view of the cluster groups between a "list" and "grid" view and filter the cluster groups by clicking the Filters button. You can filter by cluster group name, status, and association.
Connect to live cluster↑
Info
By default, only HTTPS connection is allowed.
Warning
To minimize deployment issues, we recommend that the clusters you connect to CAEPE are new and unused, as clusters with previously deployed apps via other methods may cause errors.
Connect a cluster by clicking the New Cluster button.
Only for Google GKE cluster connection
GKE clusters can only be done via the kubectl method, refer to Connect GKE cluster via kubectl for info
You can connect to a currently live cluster. Click Connect to Live Cluster button, and click Next
In the form that appears, set a name and description for the cluster and a region.
Set the cluster type based on where the cluster is running. CAEPE supports clusters running on multiple Kubernetes providers, including:
- Amazon EKS
- Azure AKS
- Google GKE
- Lightweight Kubernetes (K3s) running on private clusters and on-premises
- Kubernetes running on private clusters and on-premises
- OCI Container Engine for Kubernetes
- Rancher Kubernetes engine
Set the environment type based on how you intend to use the cluster. The options are:
- Development
- Production
- QA
- Staging
- Smoke test
- UAT
- Others
Set the infrastructure type based on how the cluster is hosted. The options are:
- Edge
- On-Prem
- Cloud
- Airgapped
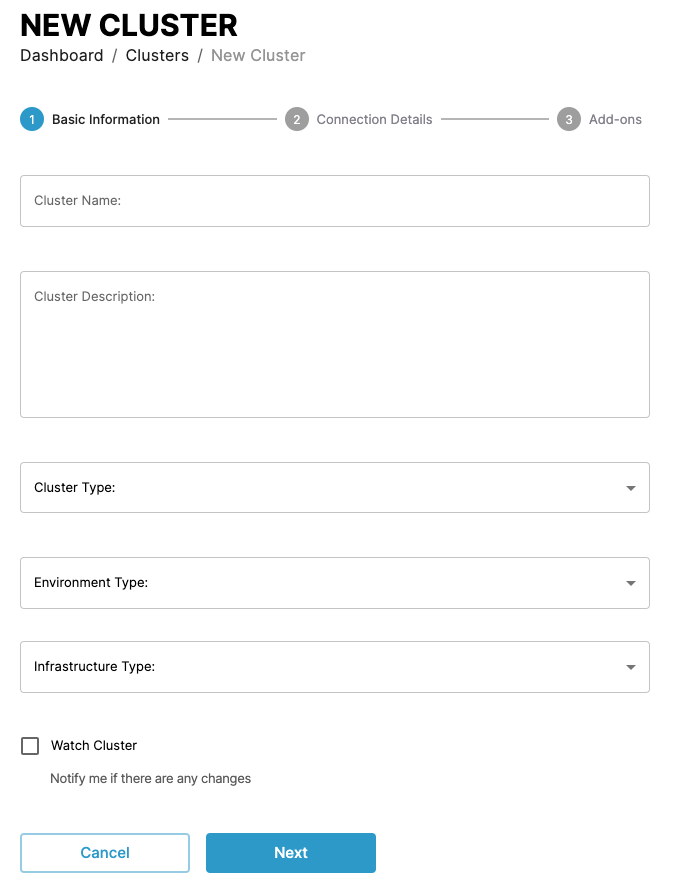
Click Next.
Kubeconfig↑
For the connection details you can connect by uploading a kube config file for the cluster
Kubectl for GKE K8s/K3s↑
This section explains how to connect a Google Kubernetes Engine (GKE) K8s or K3s cluster to CAEPE using kubectl
Connect a GKE K8s cluster via kubectl↑
Prerequisites
Before starting, ensure you have the following:
- Kubeconfig file from DevOps
- WSL (Windows Subsystem for Linux)
kubectlCLI is installed in WSL – verify withkubectl -h
- Complete the form, ensure - Cluster Type:
K8s-Kubernetesis selected and click Next. - Select Kubectl, then click Next.
- Click Connect Cluster.
-
Copy the generated
curlcommand displayed after creation .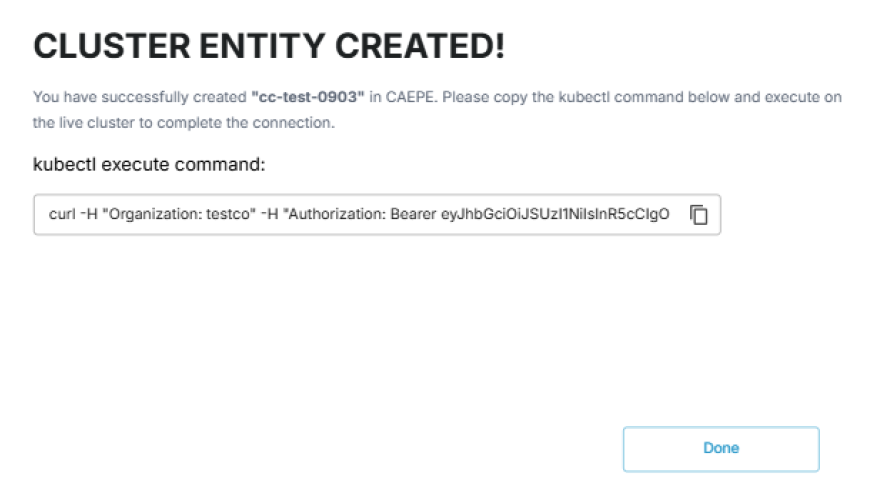
-
Run the
curlcommand copied from Step 4, but save it to a file first: -
Apply the configuration file:
-
Wait for the cluster to appear as Healthy in the CAEPE. You can also verify manually:
Once connected:
- The GKE cluster appears under Clusters in CAEPE with status Healthy.
- Applications can be deployed and monitored directly through the Web App.
Connect a GKE K3s cluster via kubectl↑
Prerequisites
Before starting, ensure you have the following:
- PEM file: ARM-K3S-Node_key.pem (provided by DevOps)
- SSH credentials
- Complete the form, ensure - Cluster Type:
K3s-Lightweight Kubernetesis selected and click Next. - Select Kubectl, then click Next.
- Click Connect Cluster.
-
Copy the generated
curlcommand displayed after creation . -
Connect to the target node via SSH using the following command:
-
Switch to root:
-
Navigate to the working directory.
-
Use the copied
curlcommand and modify it to save output to a file: -
Verify the file was created successfully and with valid content:
10. Apply the configuration using the relevant K3s kubeconfig: -
Wait for the cluster to appear as Healthy in the CAEPE Web App. You can also check directly from the node:
Deploy a test application (e.g., Webshop) from the CAEPE Web App to confirm successful connection and workload deployment
Build and connect a live cluster↑
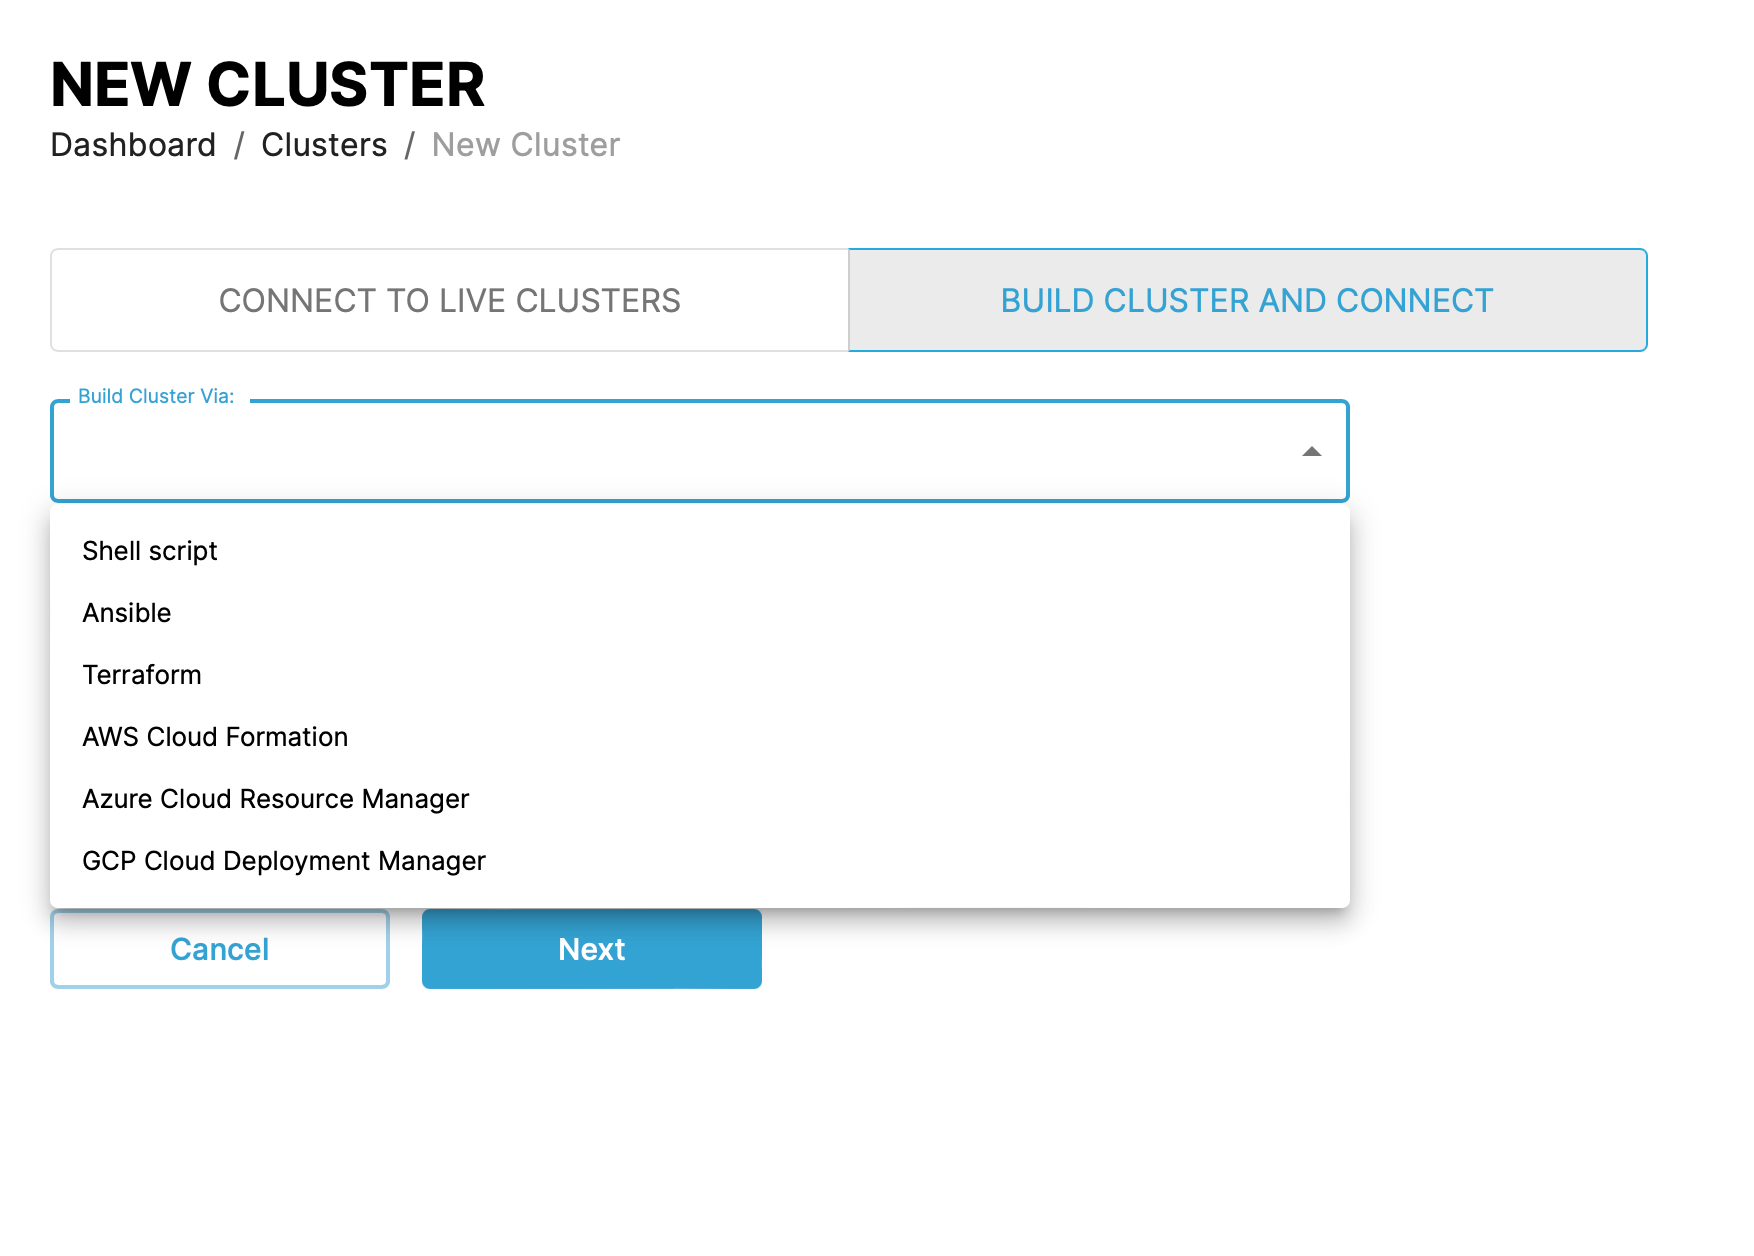
If you choose the Build cluster and connect option, the creation form shows the various options for building a cluster, these are:
- Run a shell script
- An Ansible playbook
- A Terraform definition file
- An AWS CloudFormation template
- An Azure Cloud Resource Manager template
- A GCP Deployment Manager template
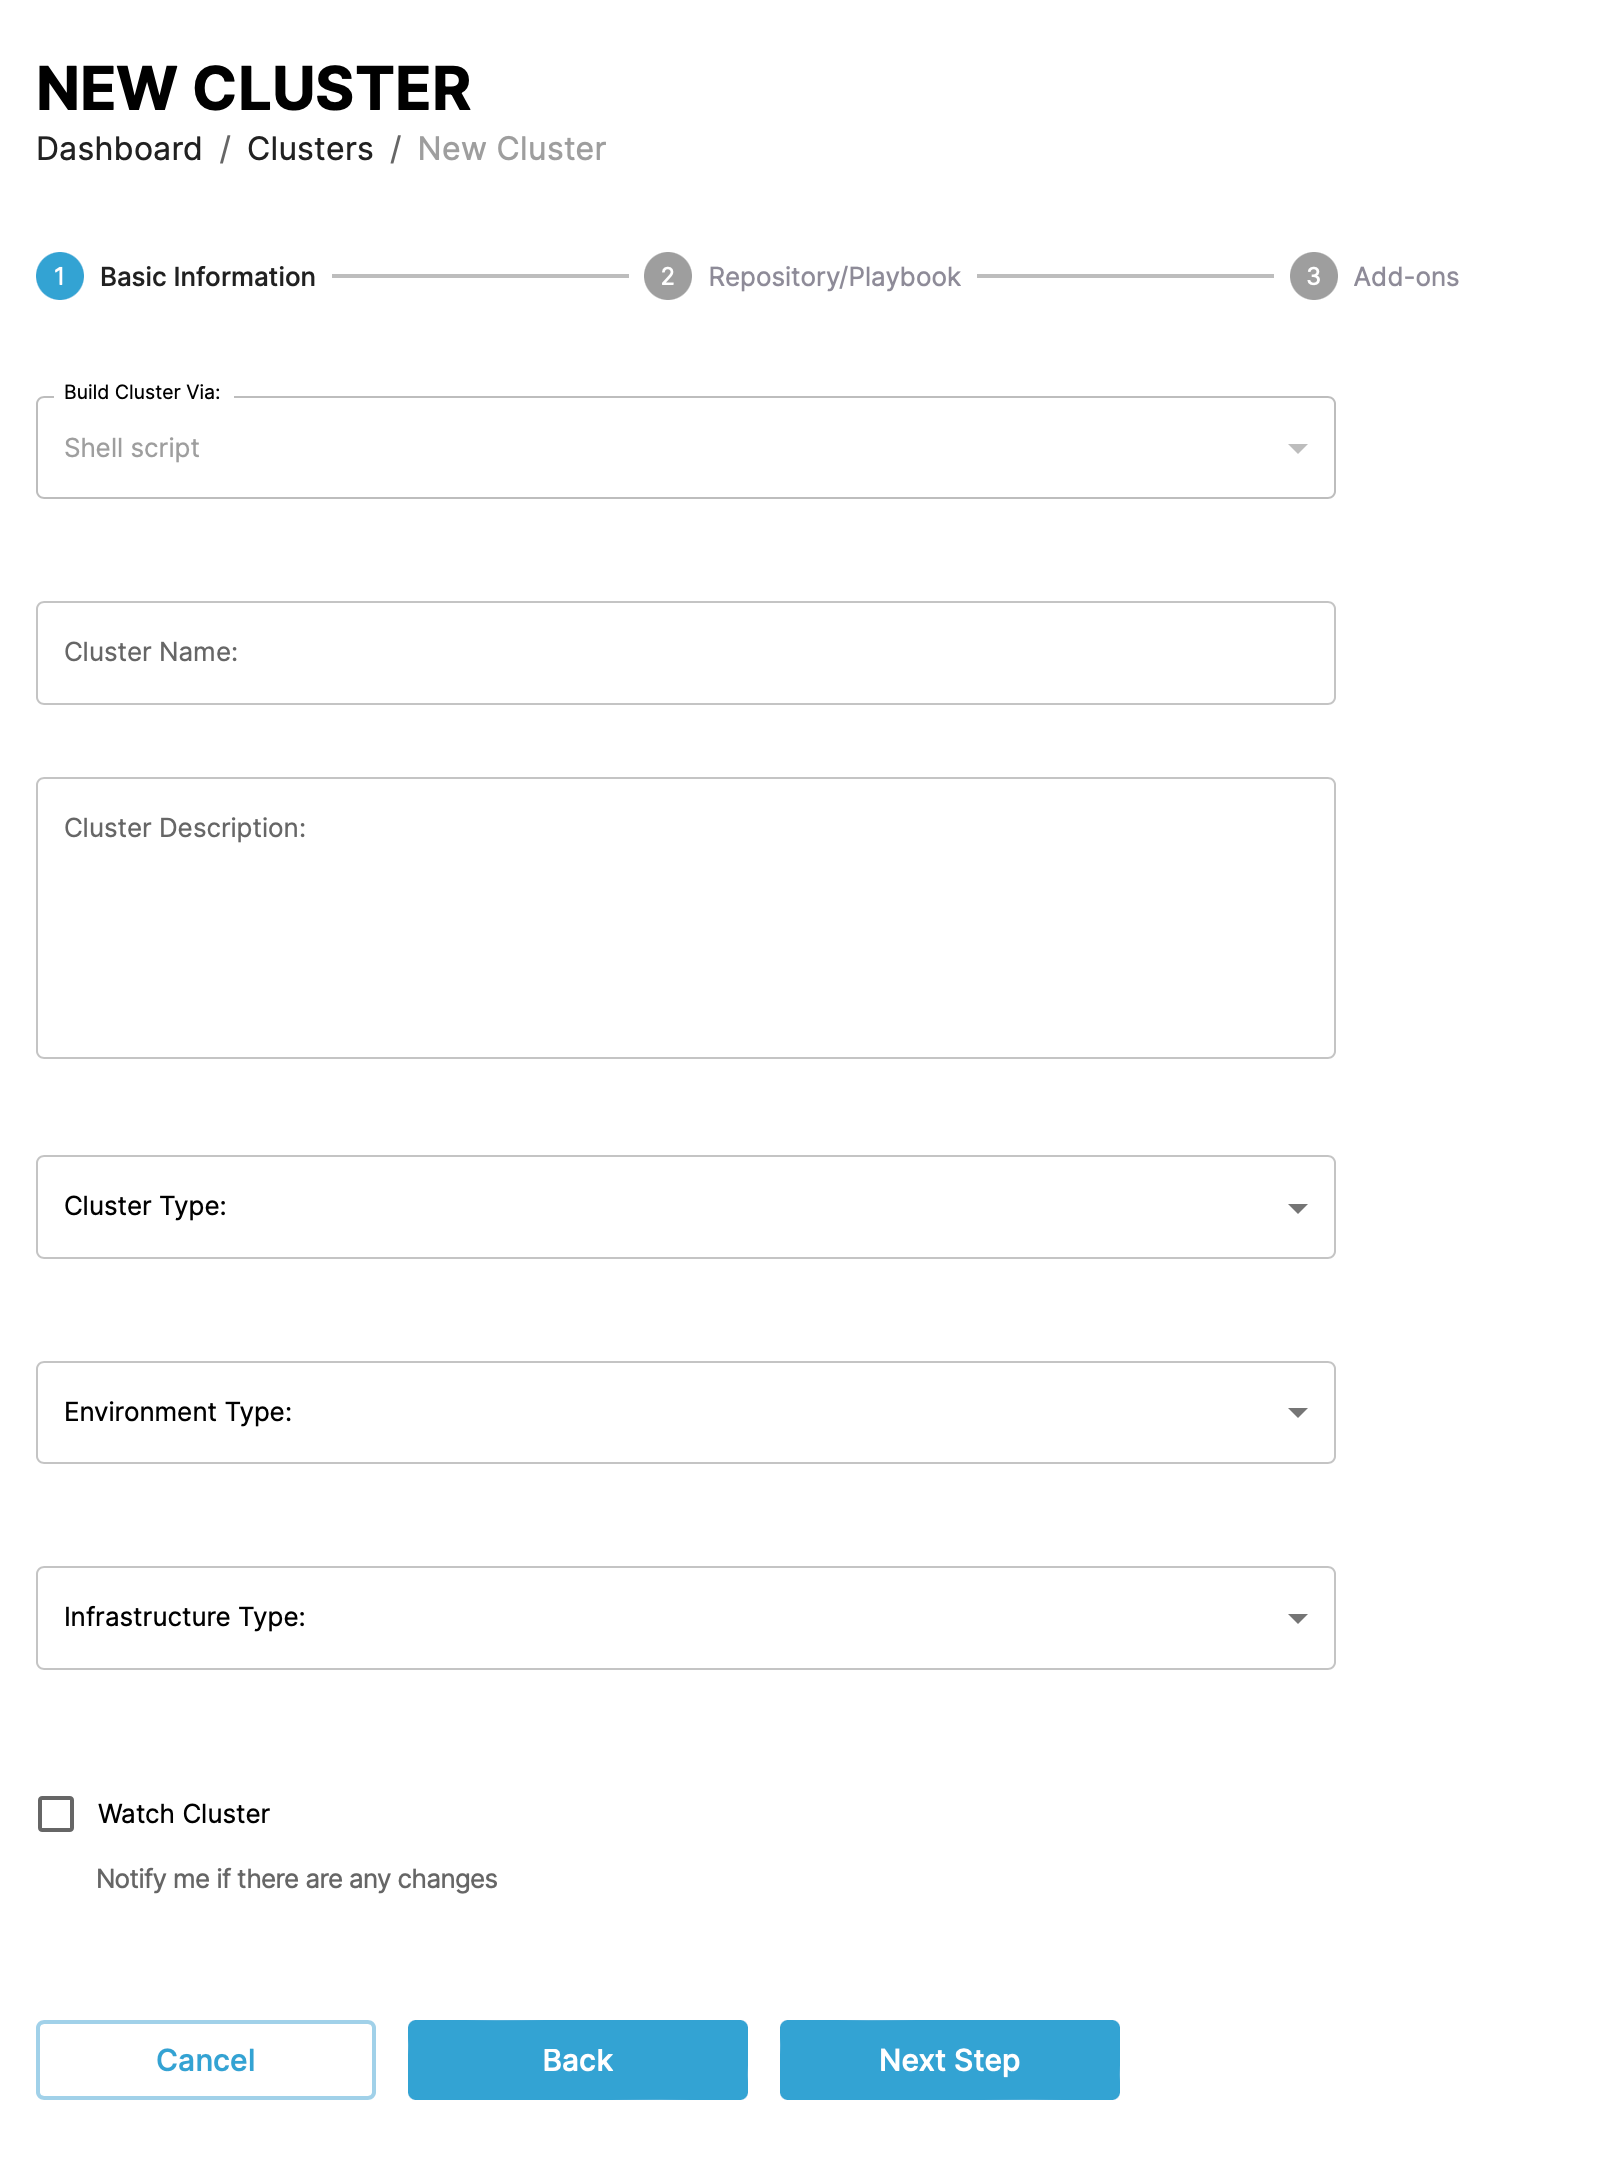
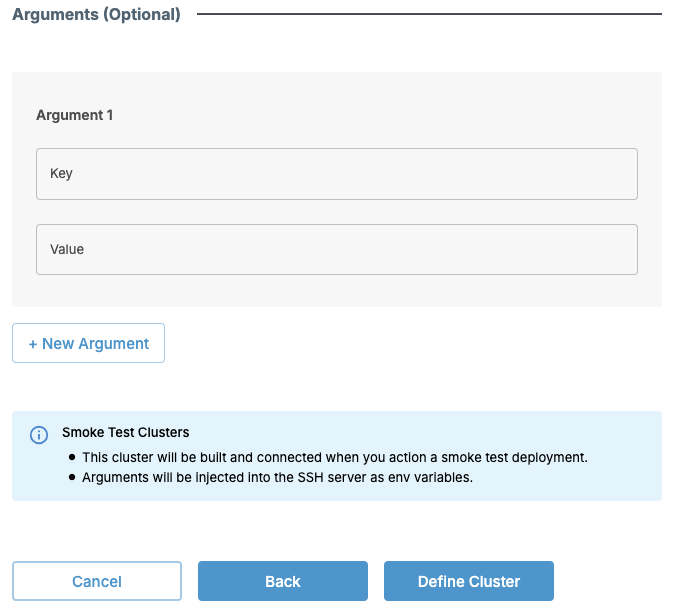
After selecting the build method, in the next step add a name and description for the cluster and the cluster, environment, and infrastructure type. You can also watch the cluster for changes and use a notification integration to send notifications when the cluster state changes.
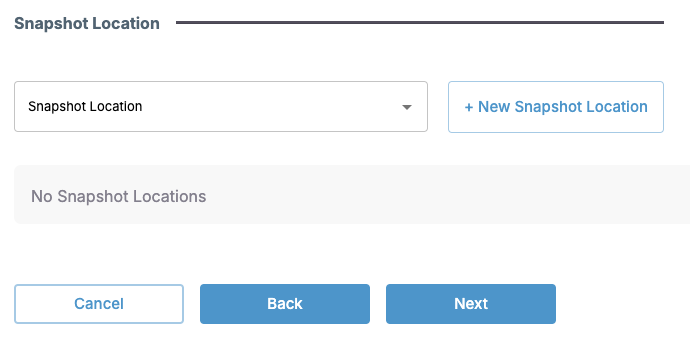
Select the snapshot location or create a new snapshot location
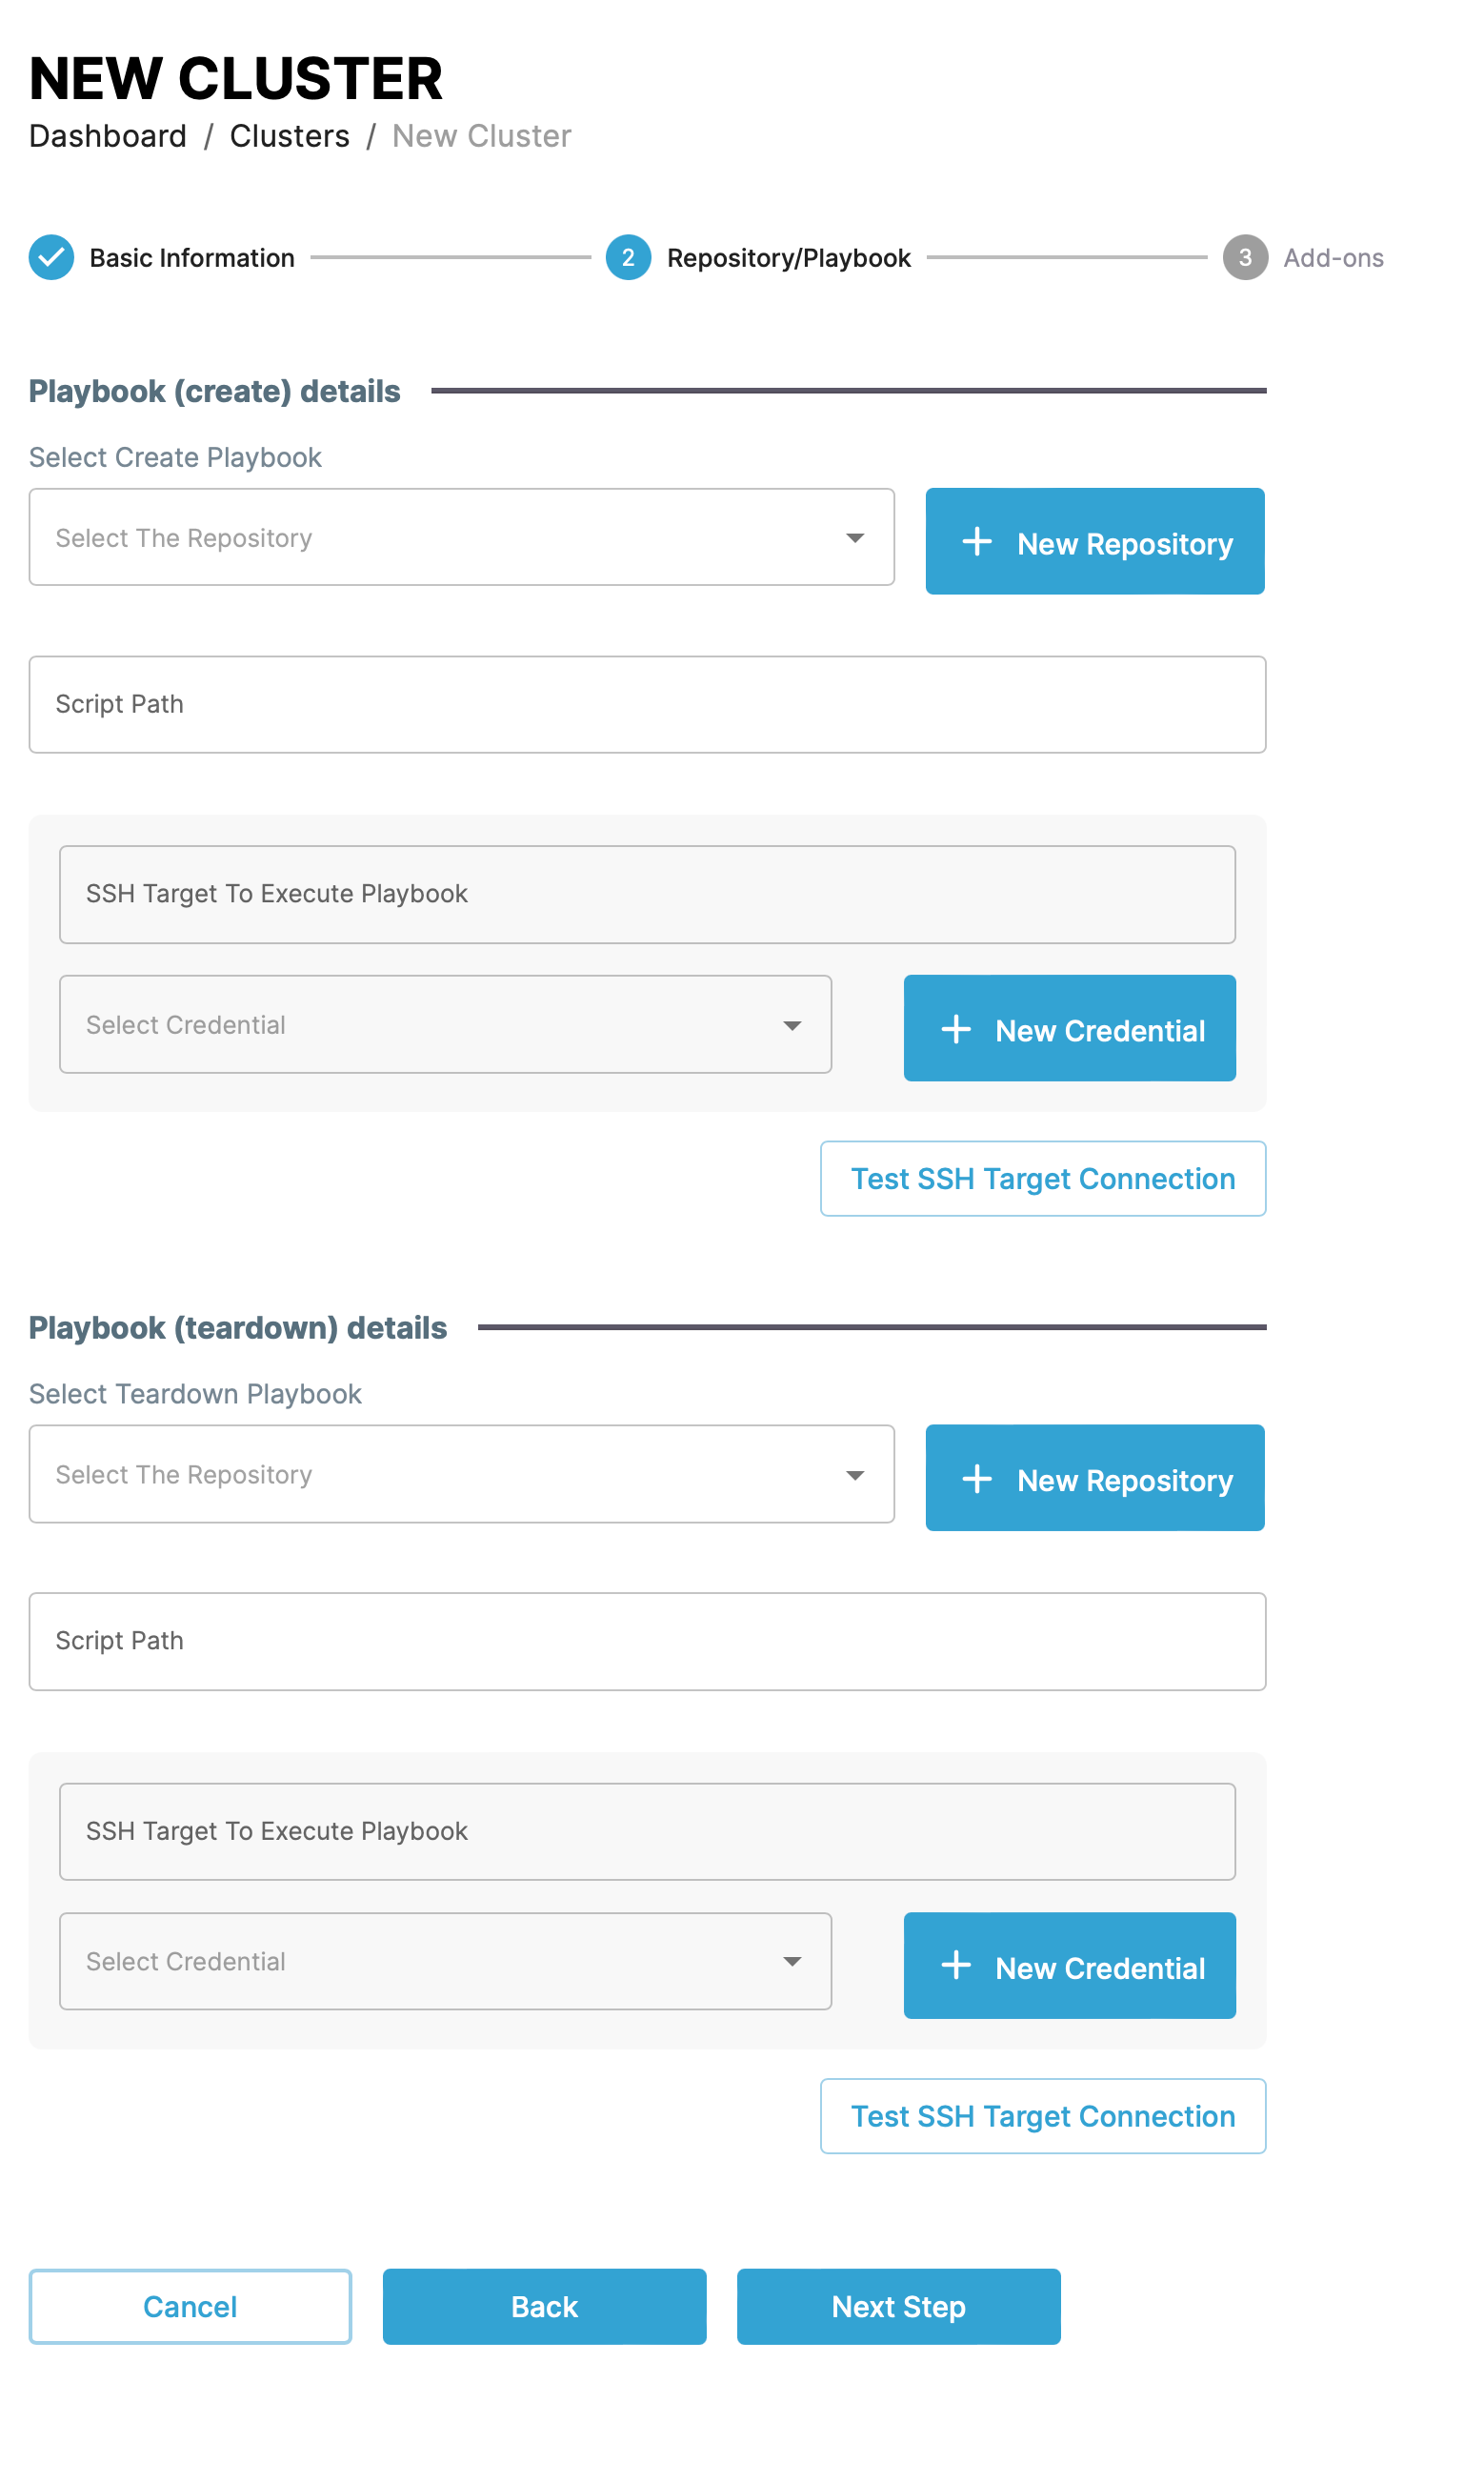
Use the next section to add playbooks to run on creation and teardown of a cluster. This example uses Anisble. You host these scripts in repositories defined in the Application source -> Repositories section and they should contain the appropriate resource type to match the build option you selected.
Info
You need an SSH credential defined to use and execute the playbook scripts.
After creation steps↑
When you create a cluster you can add it to a logical grouping of clusters. You can select a pre-existing group, or create a new one.
Info
If you add the cluster to a pre-existing group that has an application defined for it, CAEPE automatically deploys that application to the new cluster.
When the Pods are ready, the cluster shows in the list with a "Healthy" state.
Info
There are a few reasons a cluster remains in an "unhealthy" state.
It could be network connectivity, such as changes to firewall rules or network changes at the cluster. It could be a cluster issue, such as a cluster down for maintenance, due to problems, or the cluster has been deleted but not removed from Caepe, etc.
Create a cluster group↑
Create a cluster group by clicking the New Cluster Group button.
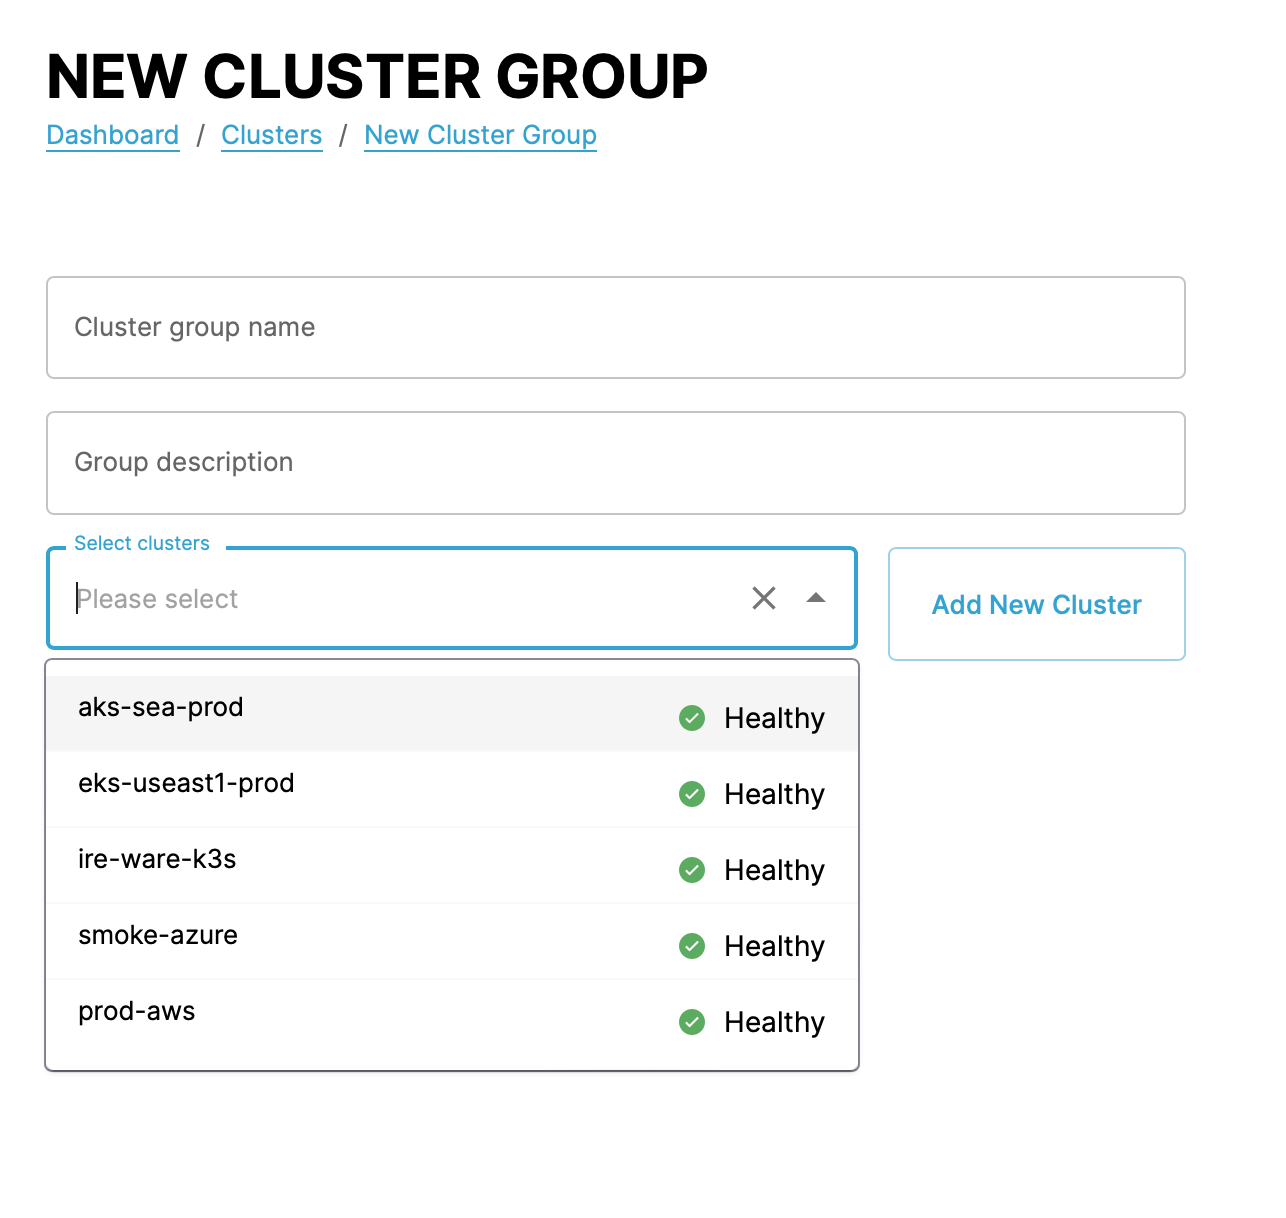
In the form that appears, set a name and description for the cluster group and select the clusters to add to the group. You can select a pre-existing cluster, or create a new one.