
Managing applications and application groups
You can follow the steps in the following demo video or follow the the instructions in the following sections to use the various CAEPE features.
This guide shows you how to manage applications and application groups from the CAEPE account portal. You can access the configuration section from the Configuration -> Applications menu item.
Applications represent an instance of an application running on a cluster or cluster group. Application groups are logical groups of applications running on a cluster or cluster group.
Viewing applications
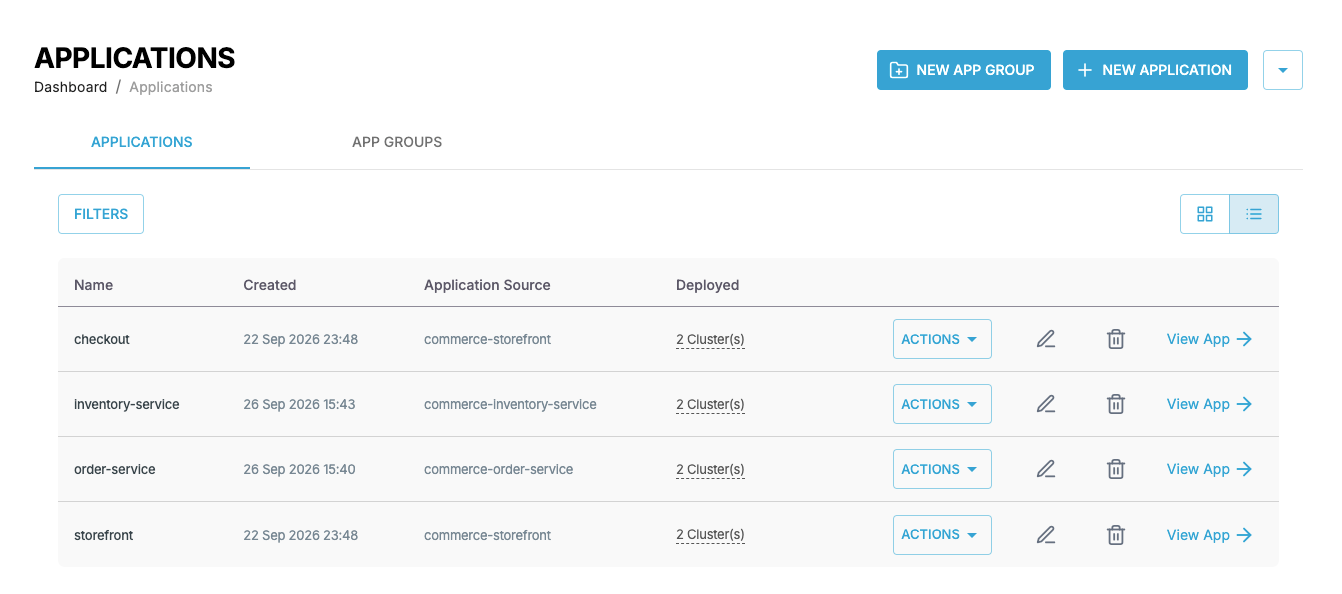
You can see the applications associated with your account in the center of the page by clicking the Applications tab, which is selected by default.
You can switch the view of the applications between a "list" and "grid" view and filter the applications by clicking the Filters button. You can filter by application name, status, and type.
Each entry in the list or grid shows the application's name, creation date, application source, and the number of clusters it is deployed to. Click the pencil icon to edit the application and the wastebasket icon to delete it.
Click the Actions button on an application to:
- Get the CLI Command that defines the application.
- Deploy the application.
Click the arrow next to the New Application button to see the generic Deploy An App CLI command.
Application details
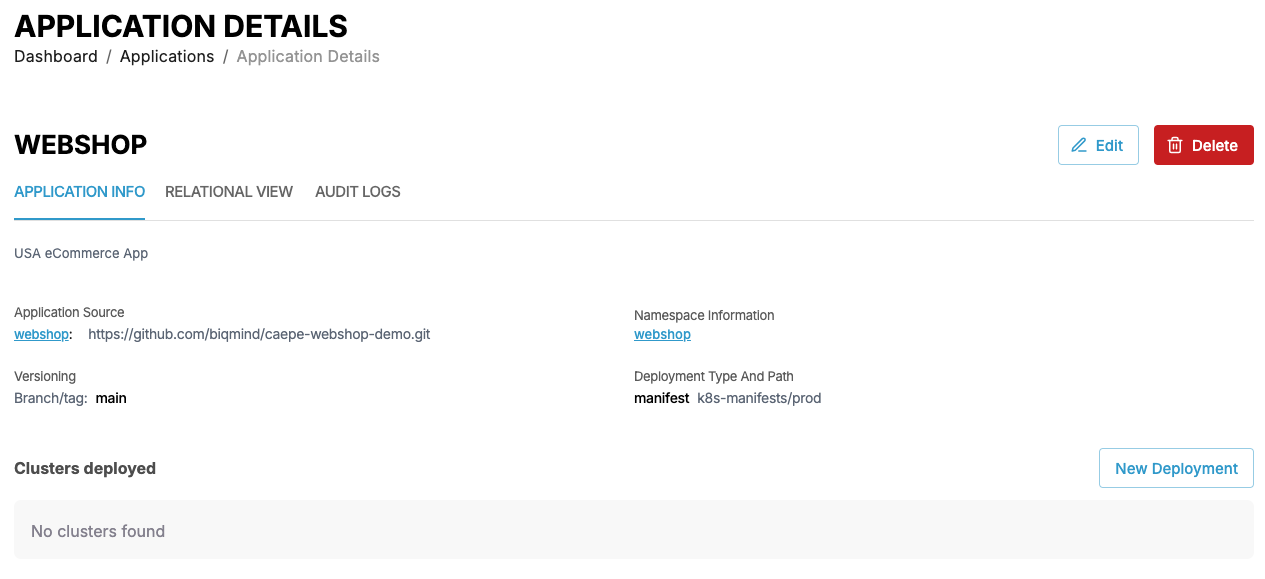
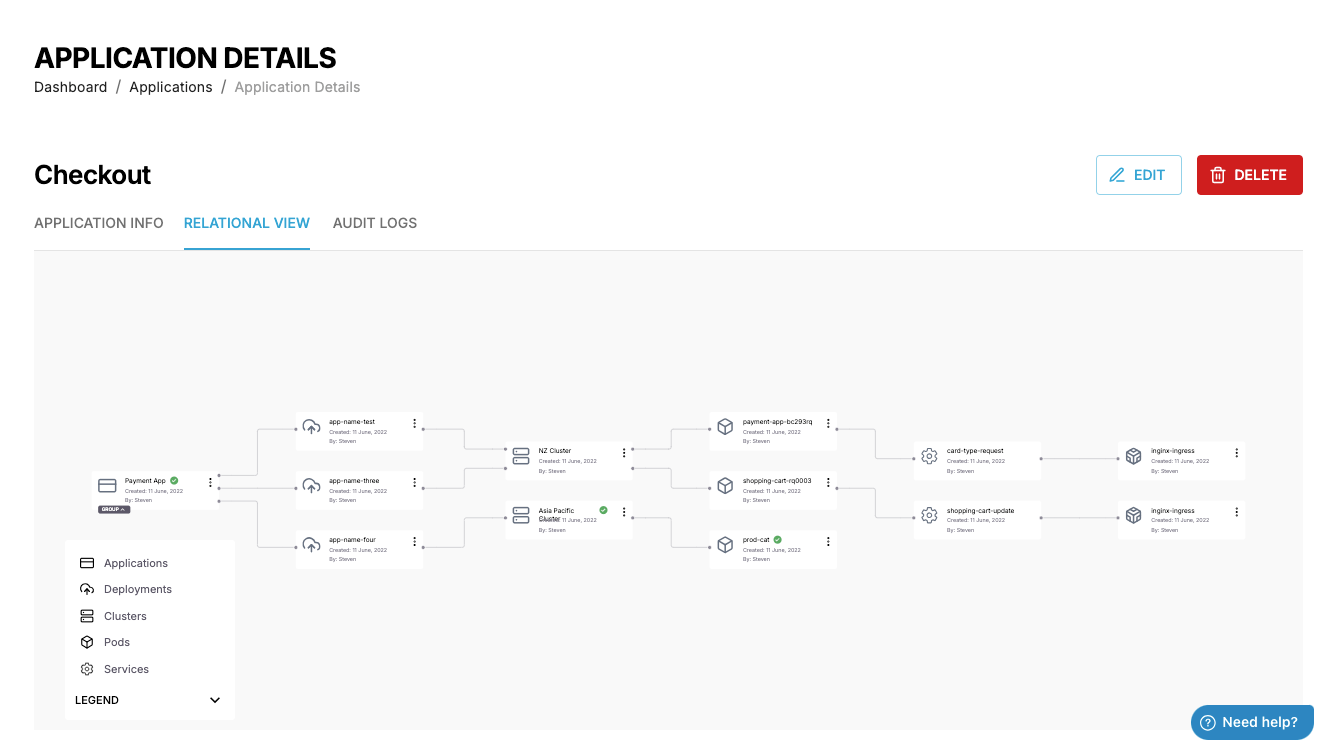
Click the View App link next to any application to open its details. The details page has three tabs:
- Application Info: the application source and repository URL, namespace, branch or tag, deployment type and path, and the clusters the application is deployed to. Click New Deployment to deploy the application.
- Relational View: a diagram of how the application connects to its deployments, clusters, pods, and services. Select Legend to see what each icon means.
- Audit Logs: the changes made to the application.
You can also edit and delete the application from the details page.
Create an application
Create an application by clicking the New Application button.
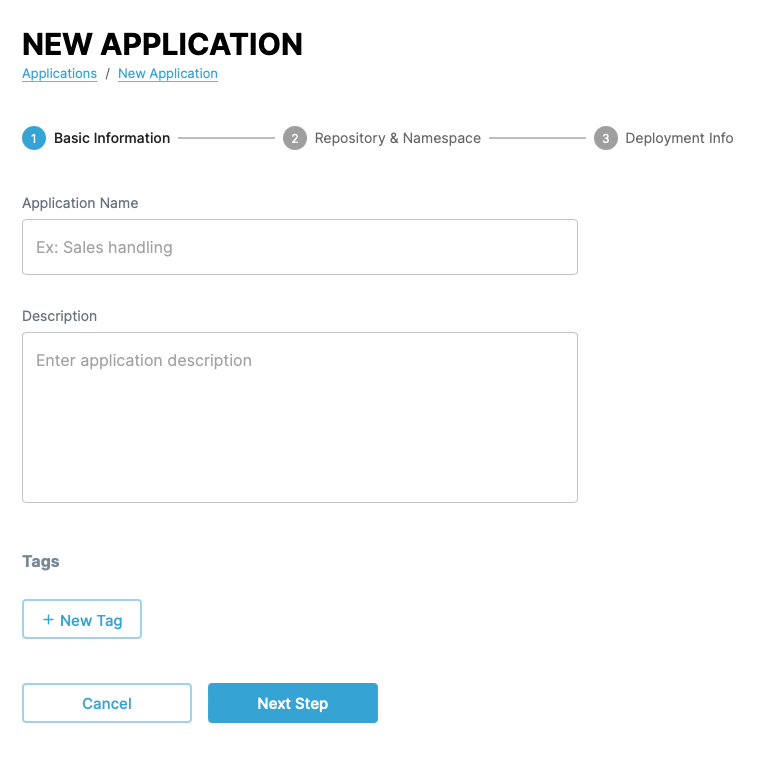
The form has three steps: Basic Information, Repository & Namespace, and Deployment Info.
In the first step of the form, set a name and description for the application, and any tags you want to add.
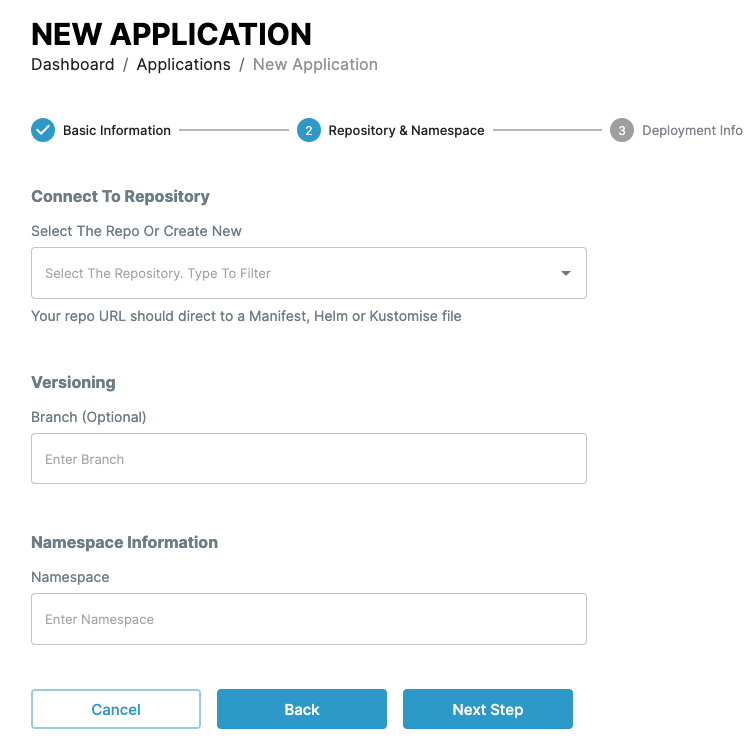
In the next step, select the repository that contains the definition of the application, the branch of the repository to use, and the namespace to use or create for the application.
When you delete an application, CAEPE doesn't delete the associated namespace. You need to manually delete the namespace using kubectl, for example, kubectl delete namespace {NAMESPACE_NAME}
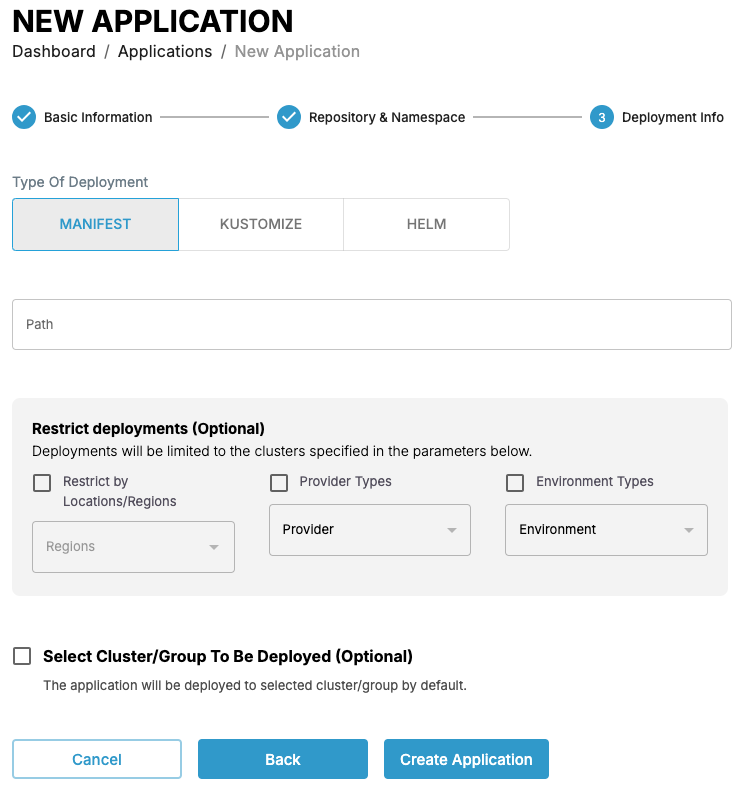
In the last step, select the type of deployment and the path to the files in the repository that define that application.
CAEPE supports the following deployment types:
- Manifest: Kubernetes manifest files. Set the path to the files.
- Kustomize: a Kustomize configuration. Set the path to the files.
- Helm: a Helm chart. Set the chart name, Helm chart path, and chart version.
Your repository URL should point to a manifest, Helm, or Kustomize file.
Restrict deployments
You can optionally restrict where the application can be deployed. Turn on Restrict deployments and set one or more of the following:
- Restrict by Locations/Regions: the regions the clusters must be in.
- Provider Types: the cluster providers, such as EKS or AKS.
- Environment Types: the cluster environments, such as Production.
CAEPE then deploys the application only to clusters that match these parameters.
Viewing application groups
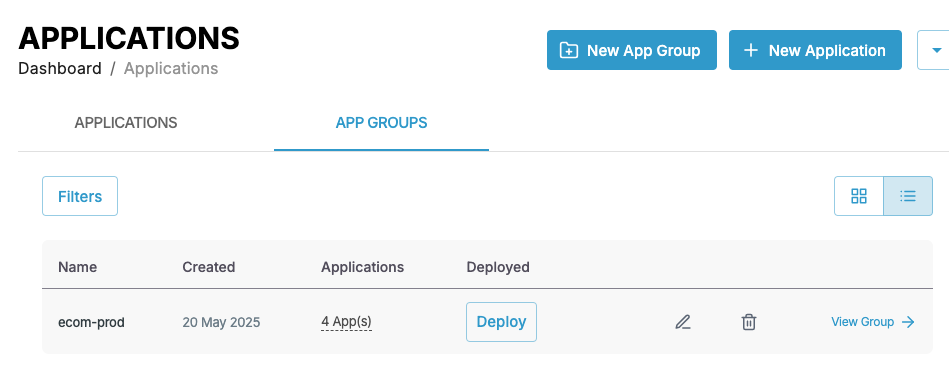
You can see the application groups associated with your account in the center of the page by clicking the App Groups tab.
You can switch the view of the application groups between a "list" and "grid" view and filter the applications by clicking the Filters button. You can filter by application group name, status, and type.
Each entry in the list or grid shows the current status of the application group, the applications part of it, and its deployment status. Click the pencil icon to edit the application group or the wastebasket icon to delete it.
Application group details
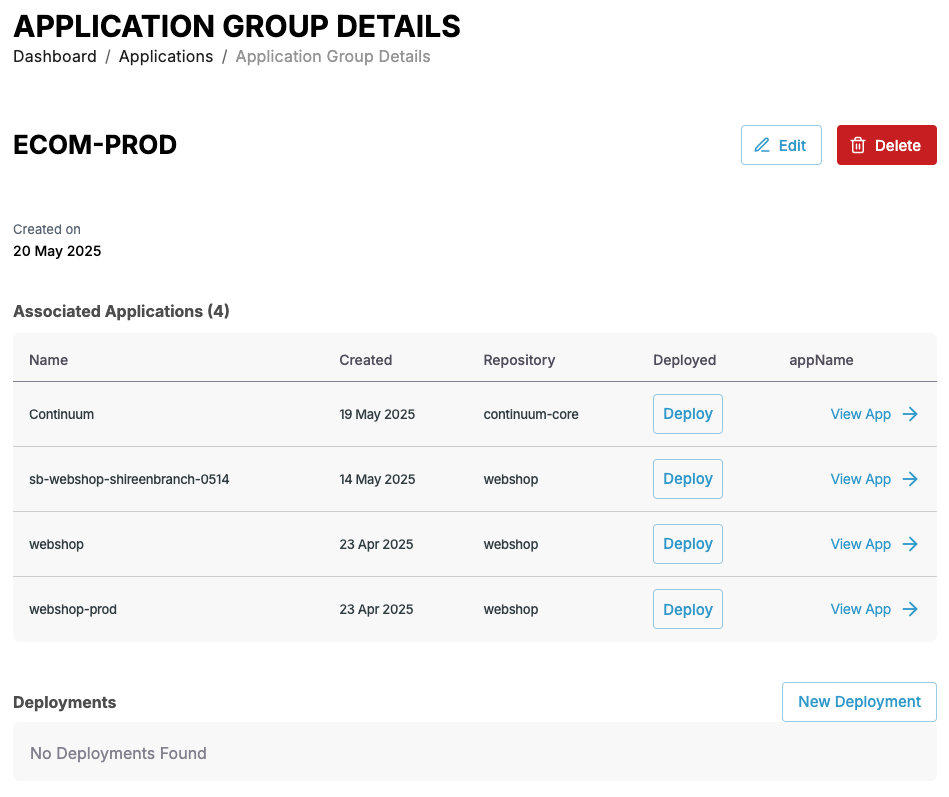
Click the View Group link next to any application group to see an overview of the detail of the application group and any applications and deployments associated with the agroup. You can also edit and delete the group from the details page.
Create an application group
Create an application group by clicking the New App Group button.
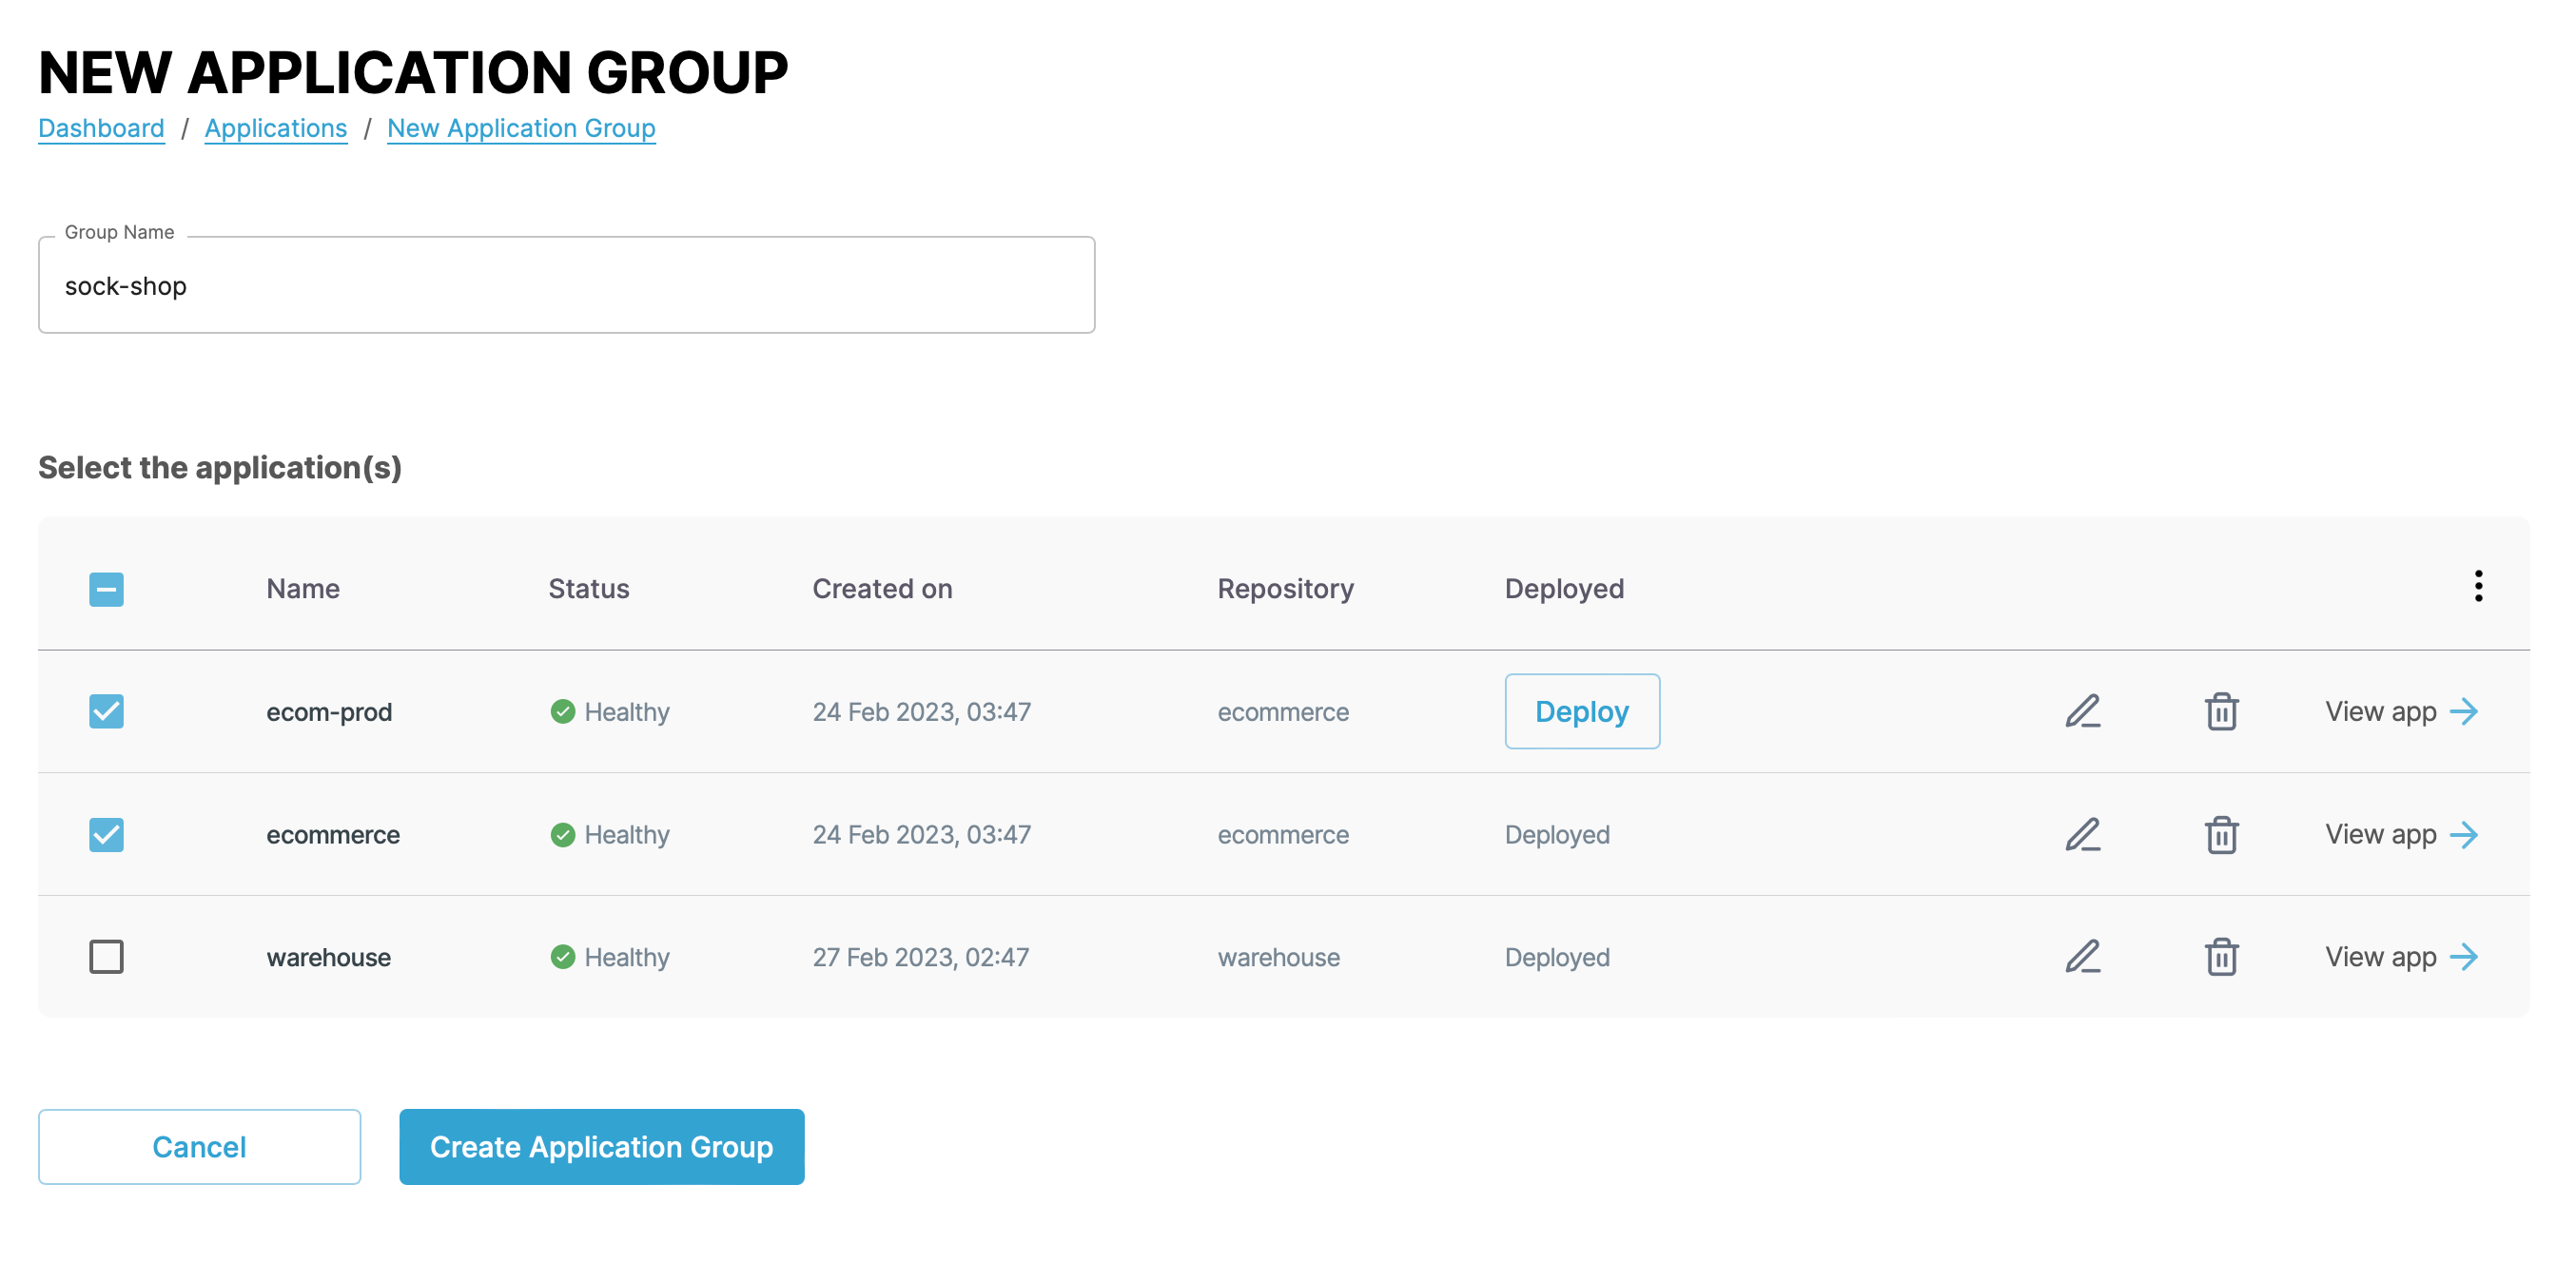
Give the application group a name, select the applications to add to the group from the list below, and click the Create Application Group button.