Managing schedules↑
You can follow the steps in the following demo video or follow the the instructions in the following sections to use the various CAEPE features.
This guide shows you how to manage schedules from the CAEPE account portal. You can access the configuration section from the Configuration -> Schedules menu item.
Info
Schedules represent an automated recurring deployment of an application to a cluster.
Viewing schedules↑
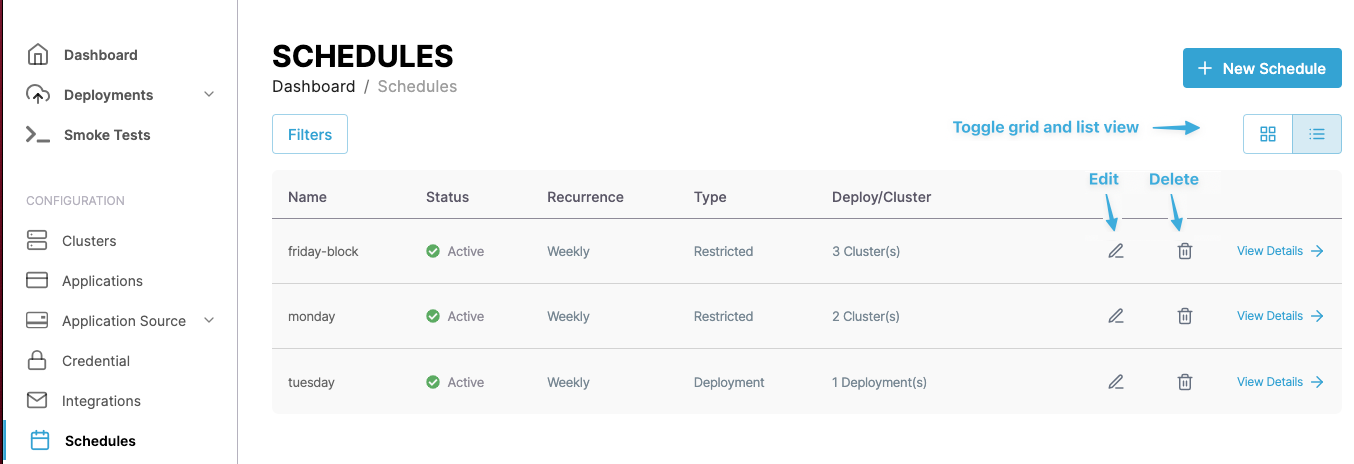
You can see the schedules associated with your account in the center of the page.
You can switch the view of the schedules between a "list" and "grid" view and filter the schedules by clicking the Filters button. You can filter by schedule name, status, and type.
Each entry in the list or grid shows the current status of the schedule, its schedule, type, and cluster deployment. Click the pencil icon to edit the cluster and the wastebasket icon to delete it.
Schedule details↑
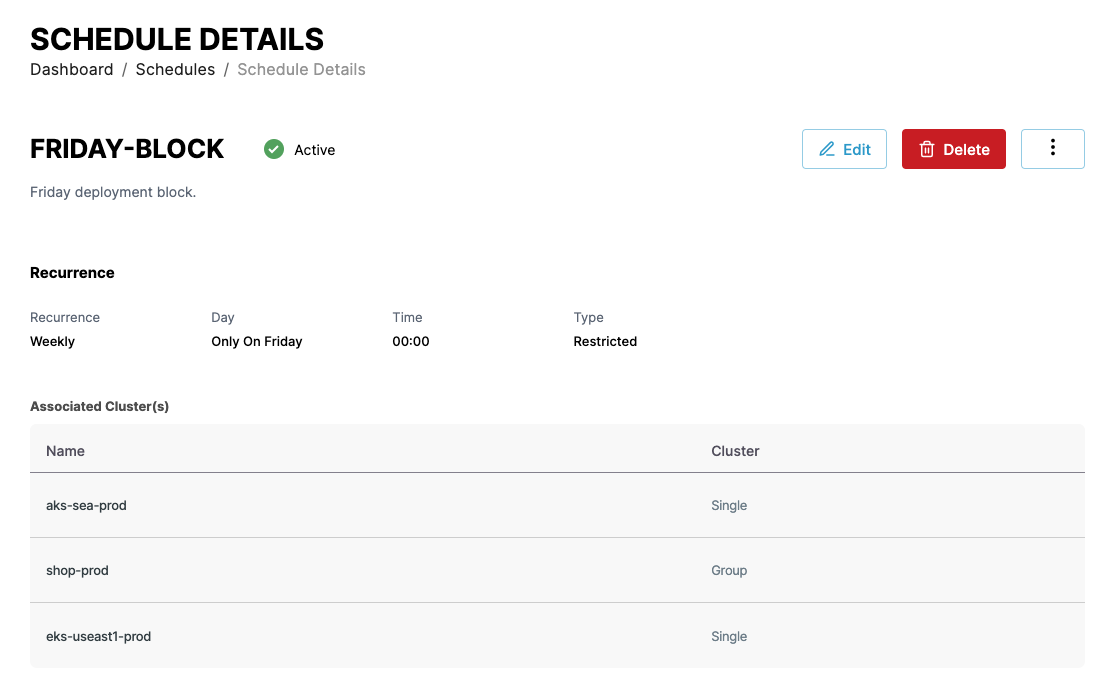
Click the View Details link next to any schedule to see more details about the schedule including the type, the credentials used, and any applications using the schedule. You can also edit and delete the schedule from the details page.
Create a schedule↑
Create a schedule by clicking the New Schedule button. CAEPE has two types of schedule:
- Deployment: For deploying an application to a deployment.
- Restricted: For blocking an application deployment to a deployment.
Deployment↑
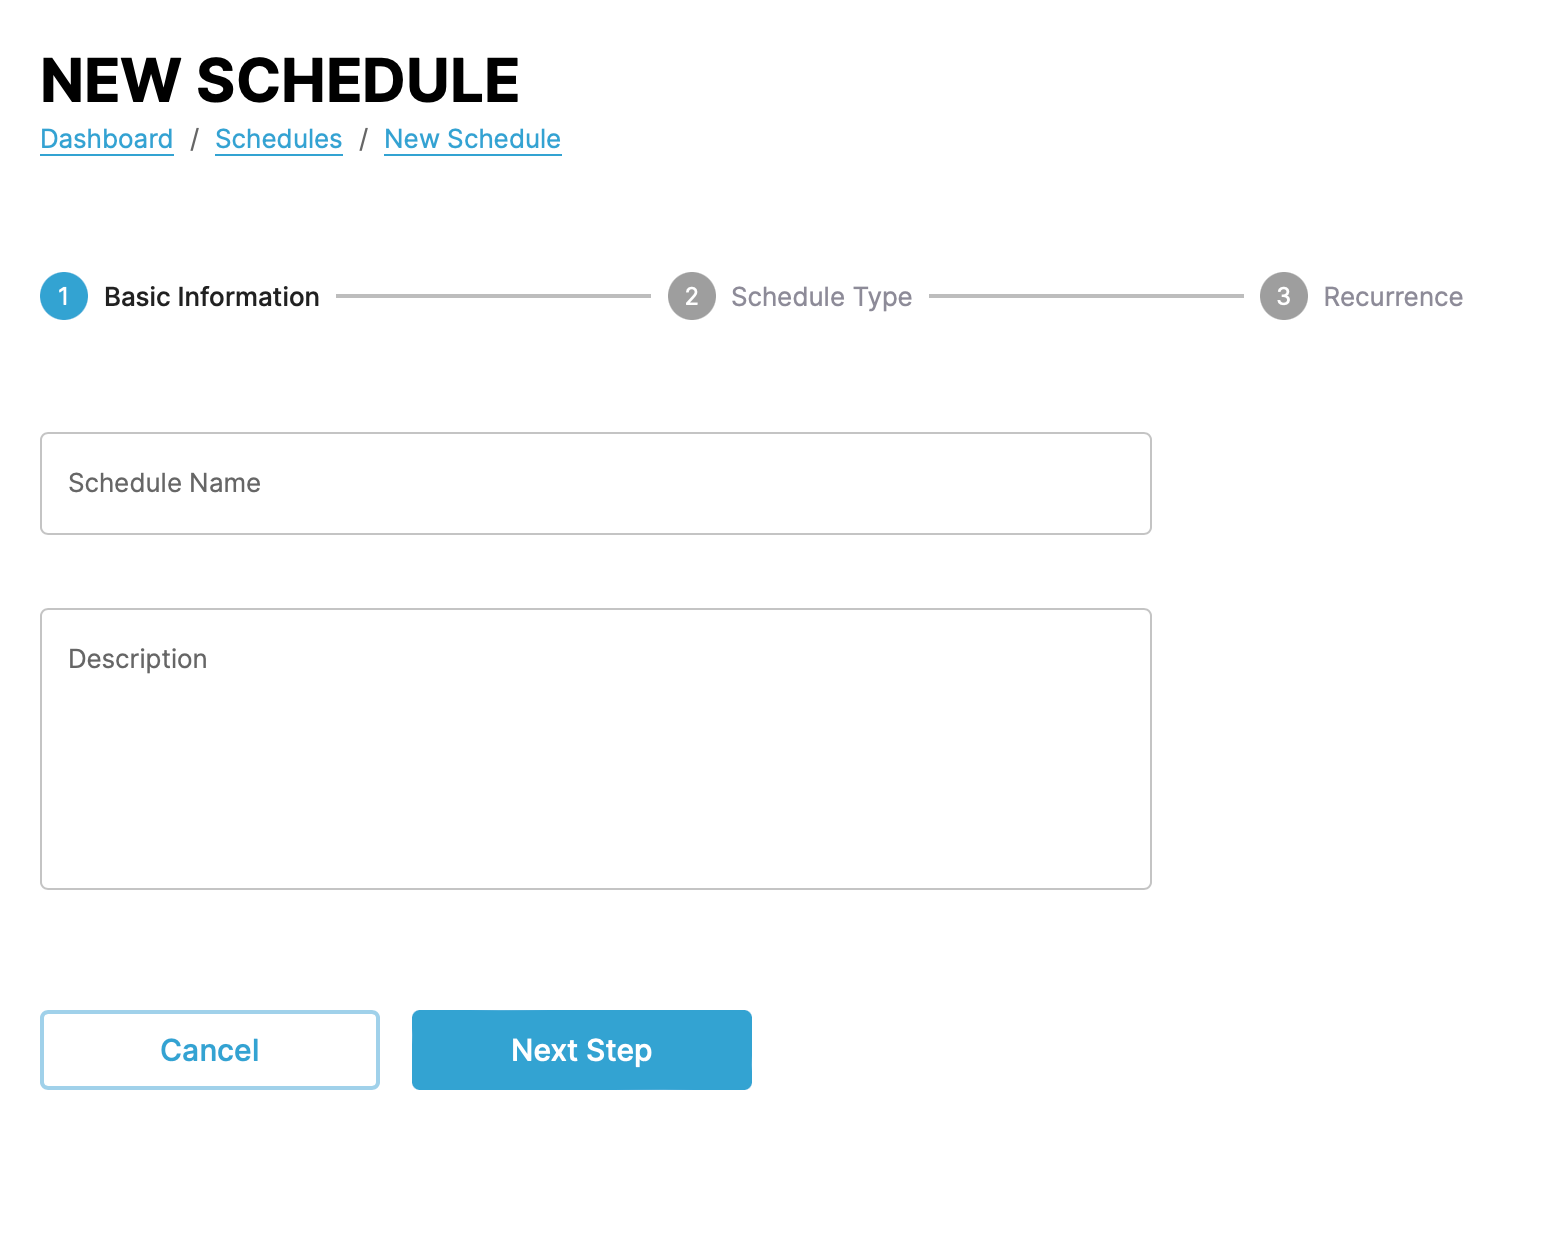
In the first step, give the schedule a name and a description.
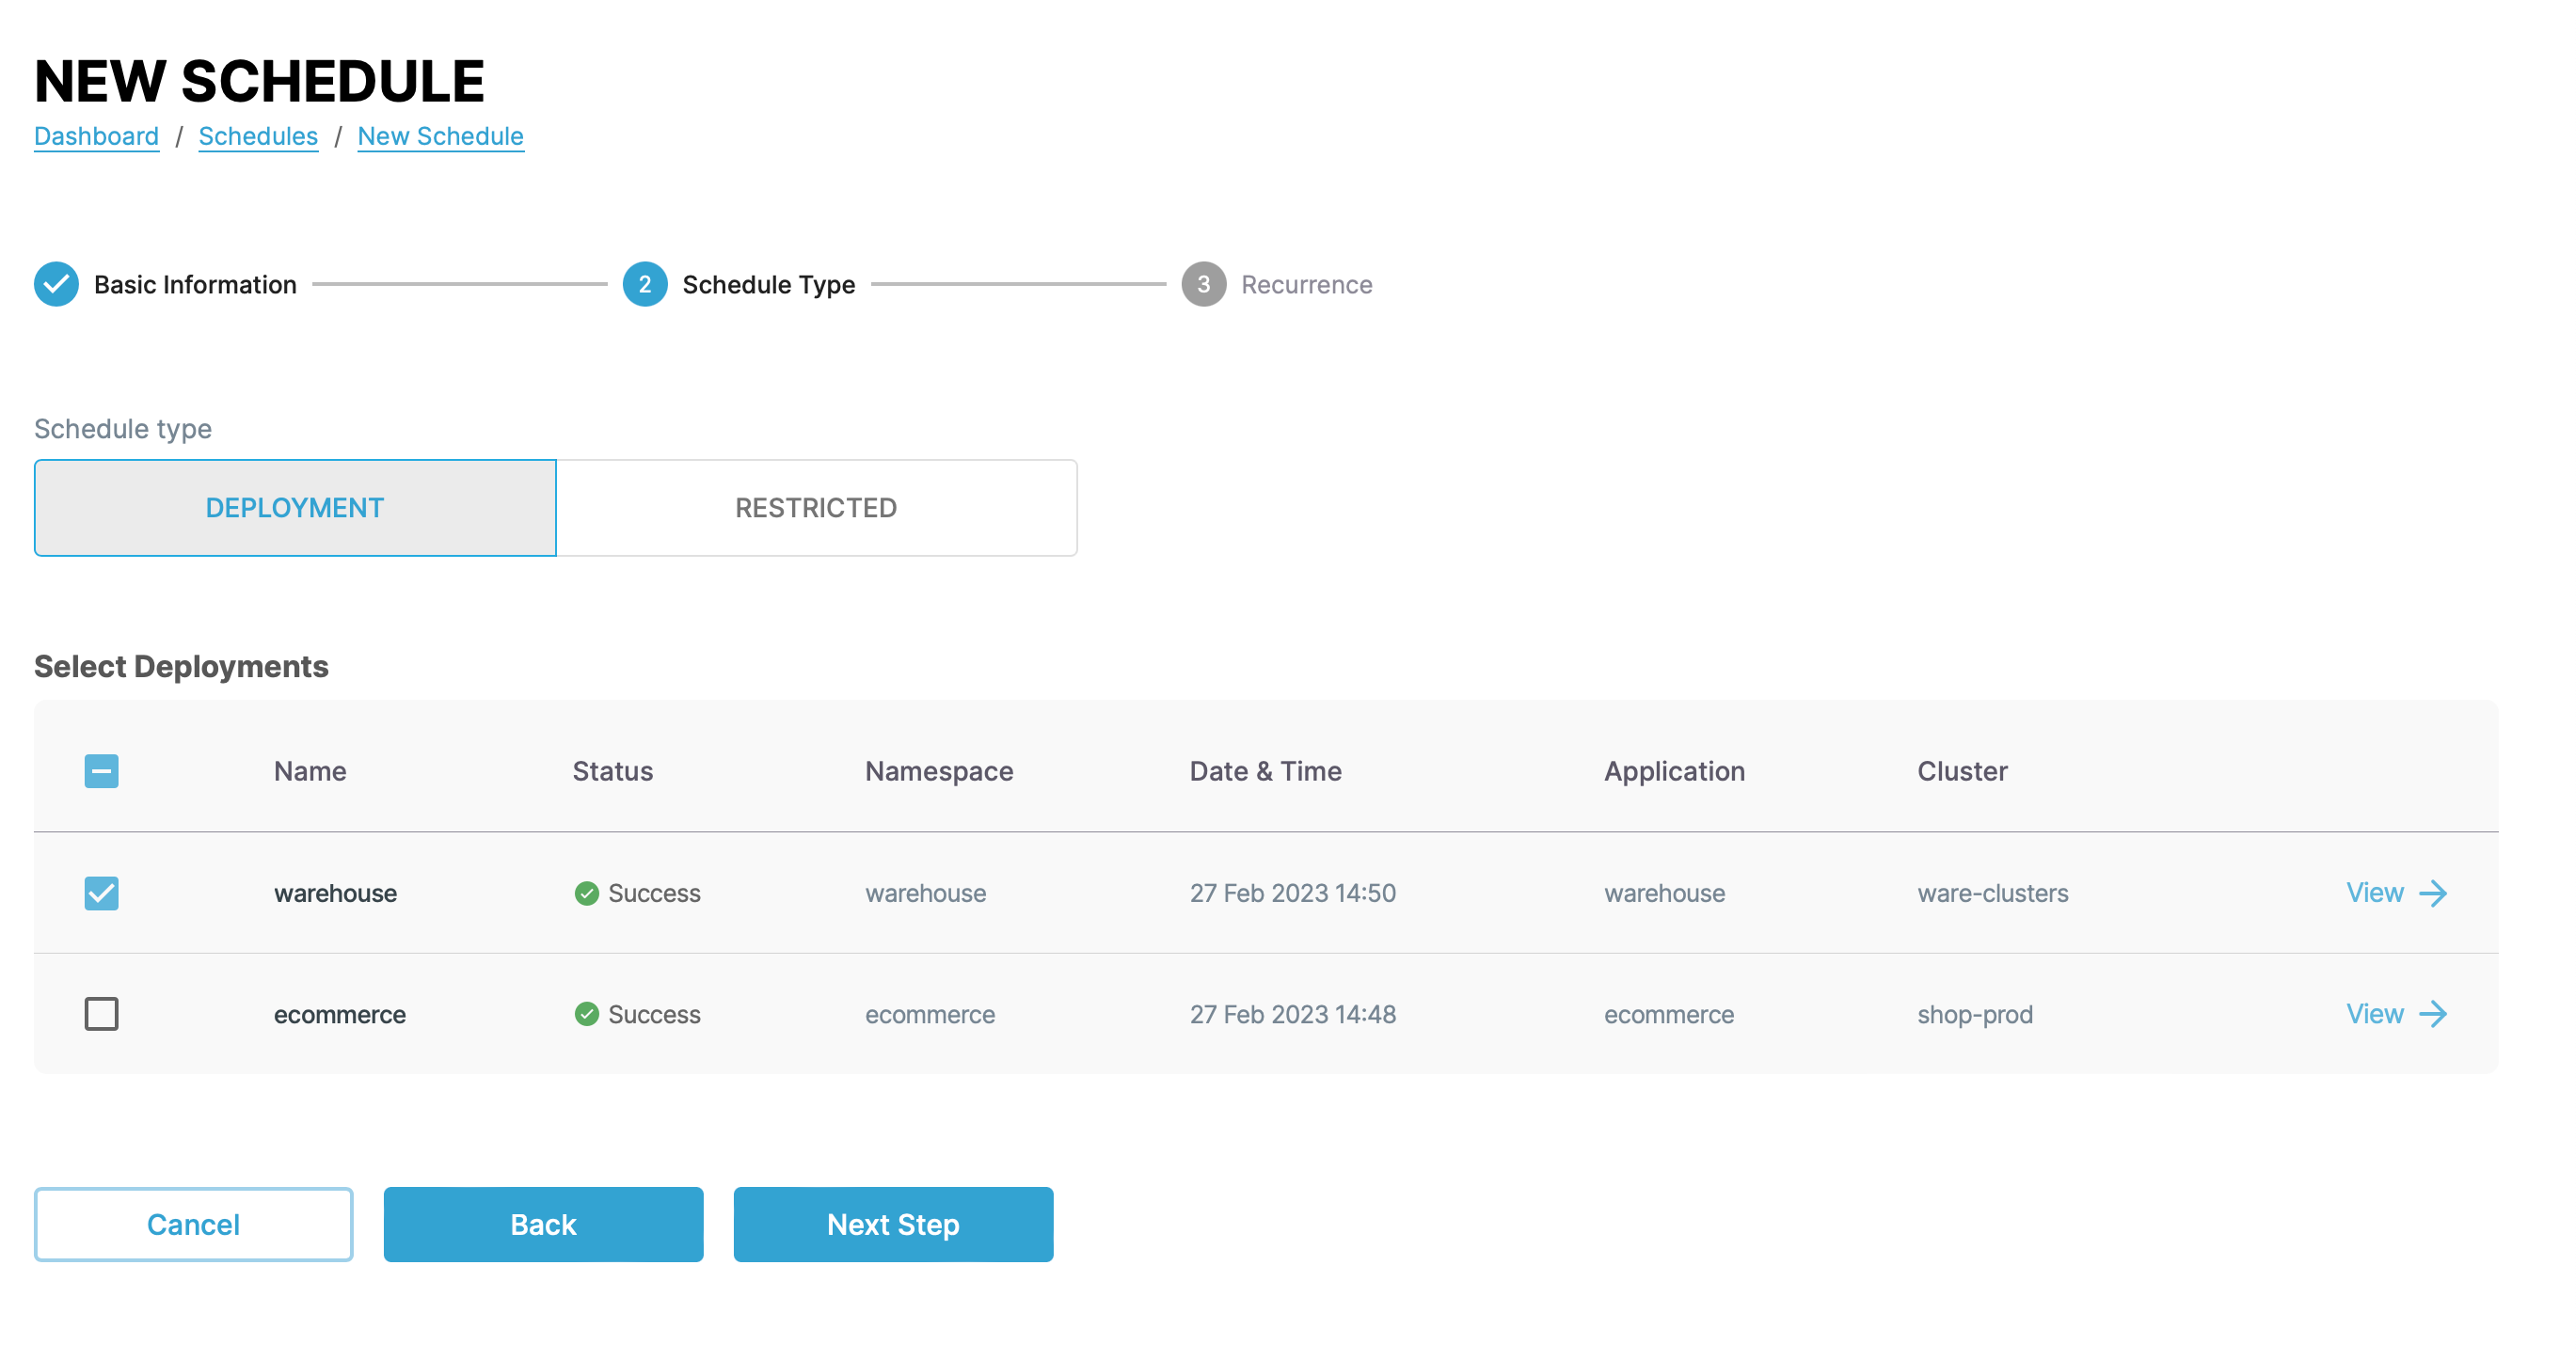
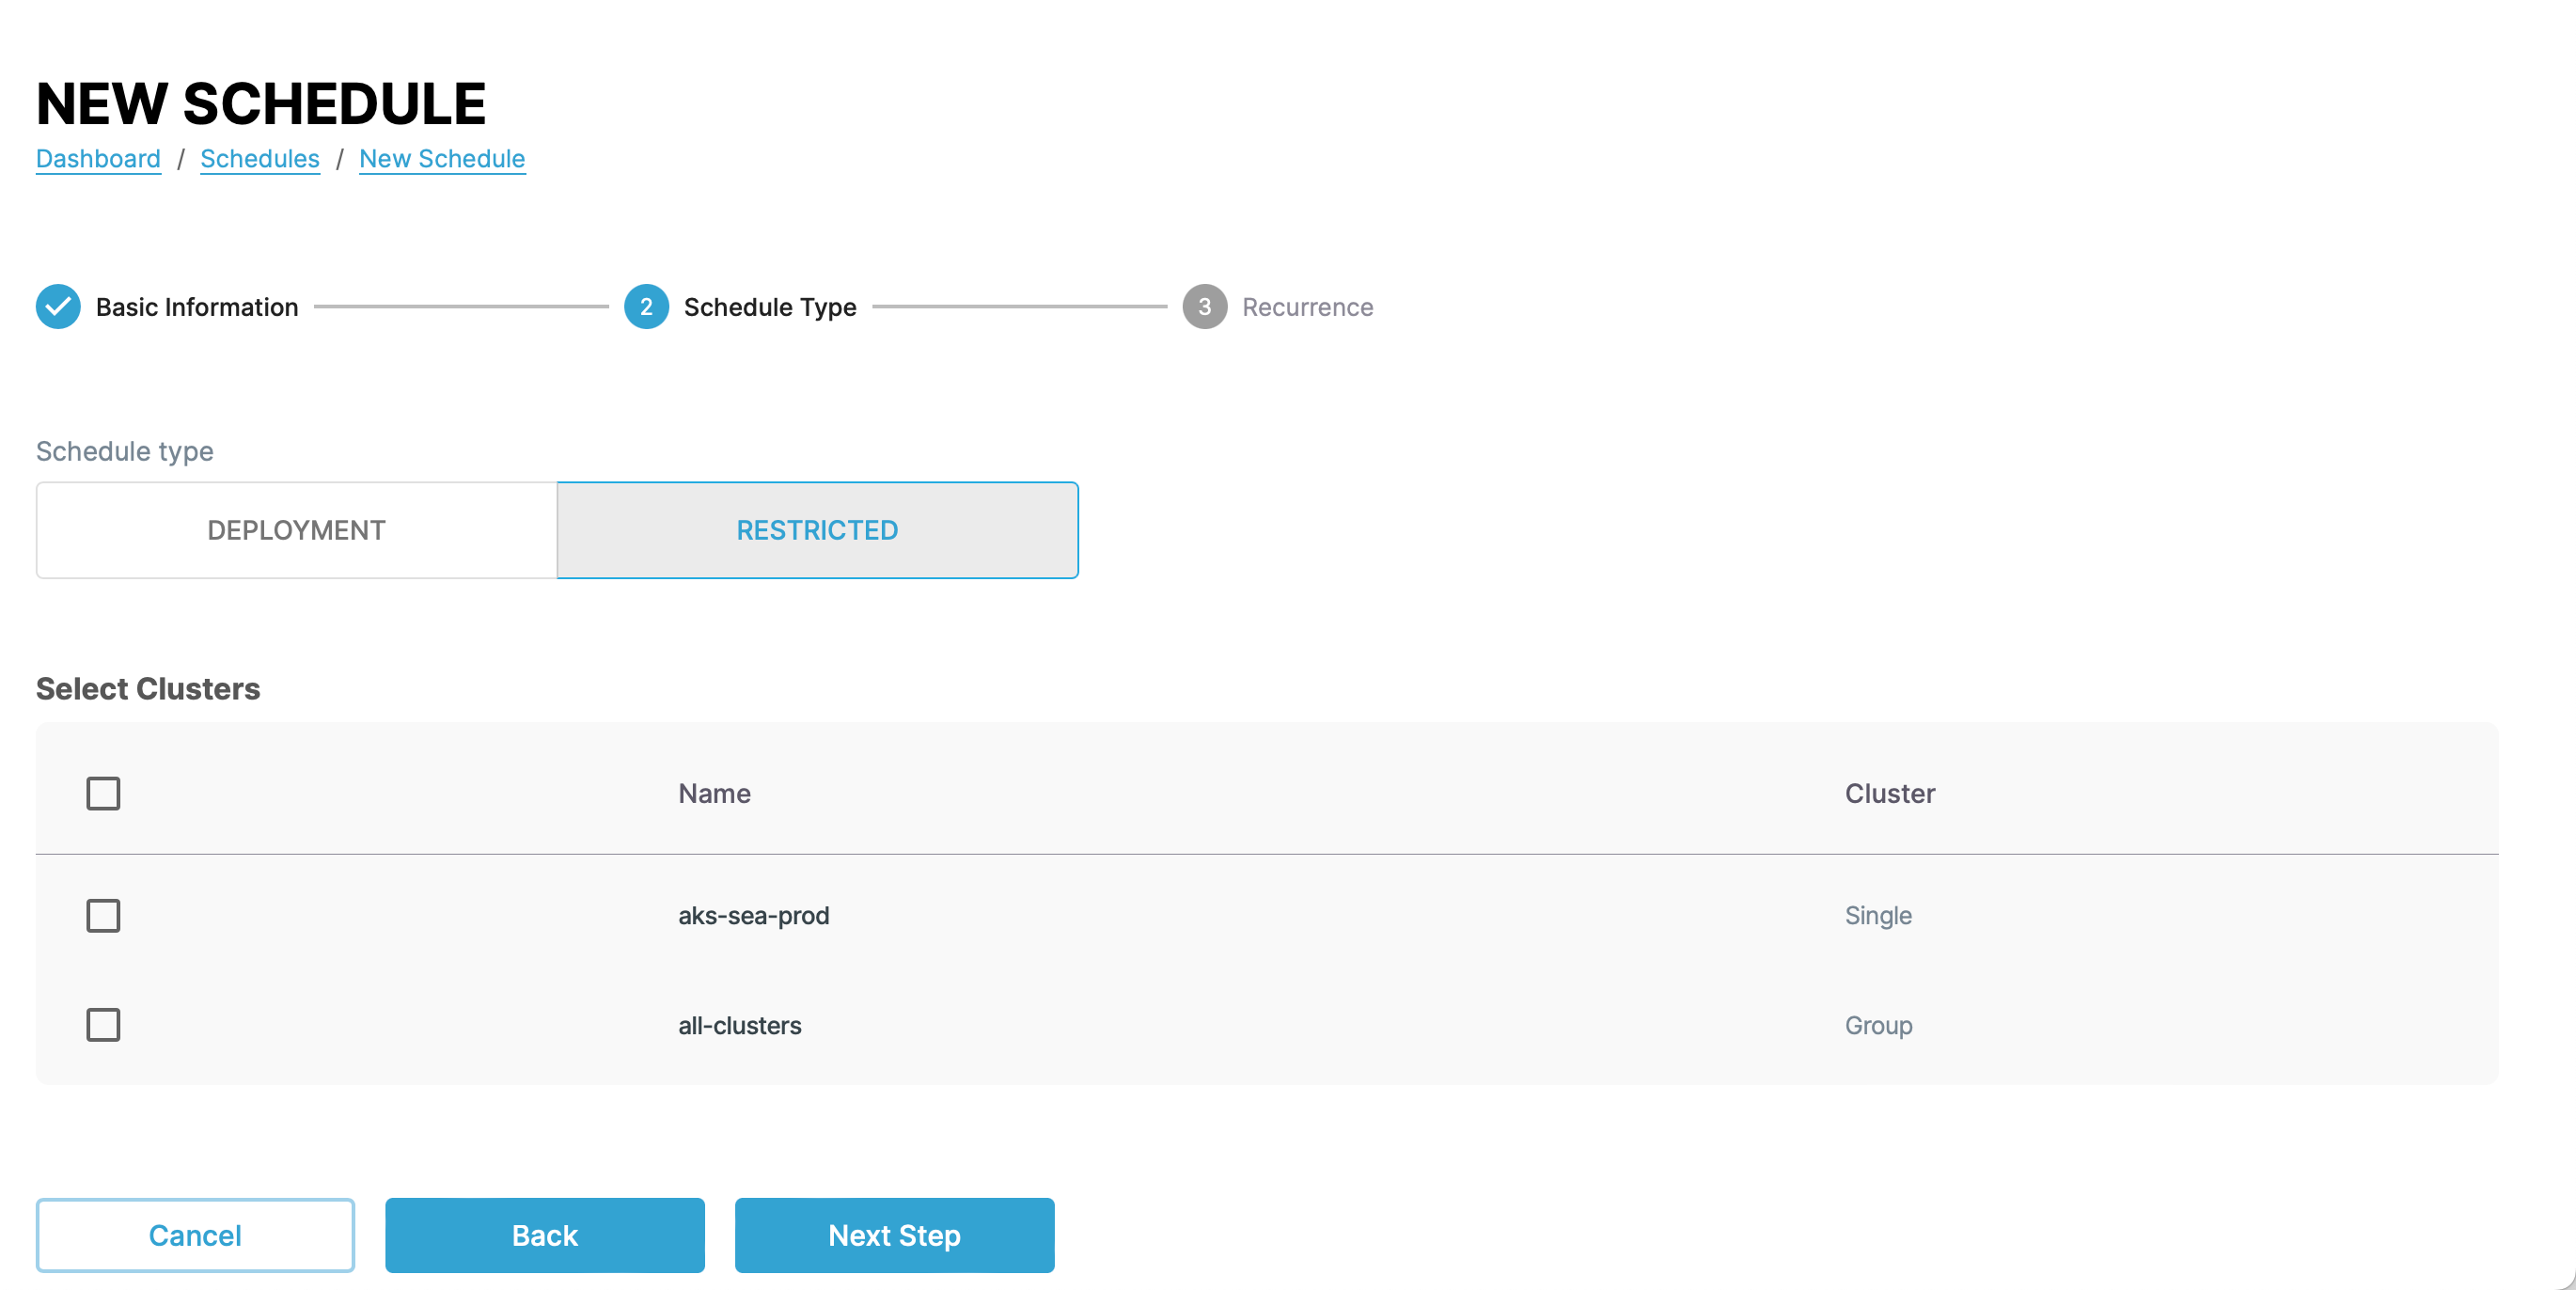
In the next step, select the schedule type and the deployments to include in the schedule.
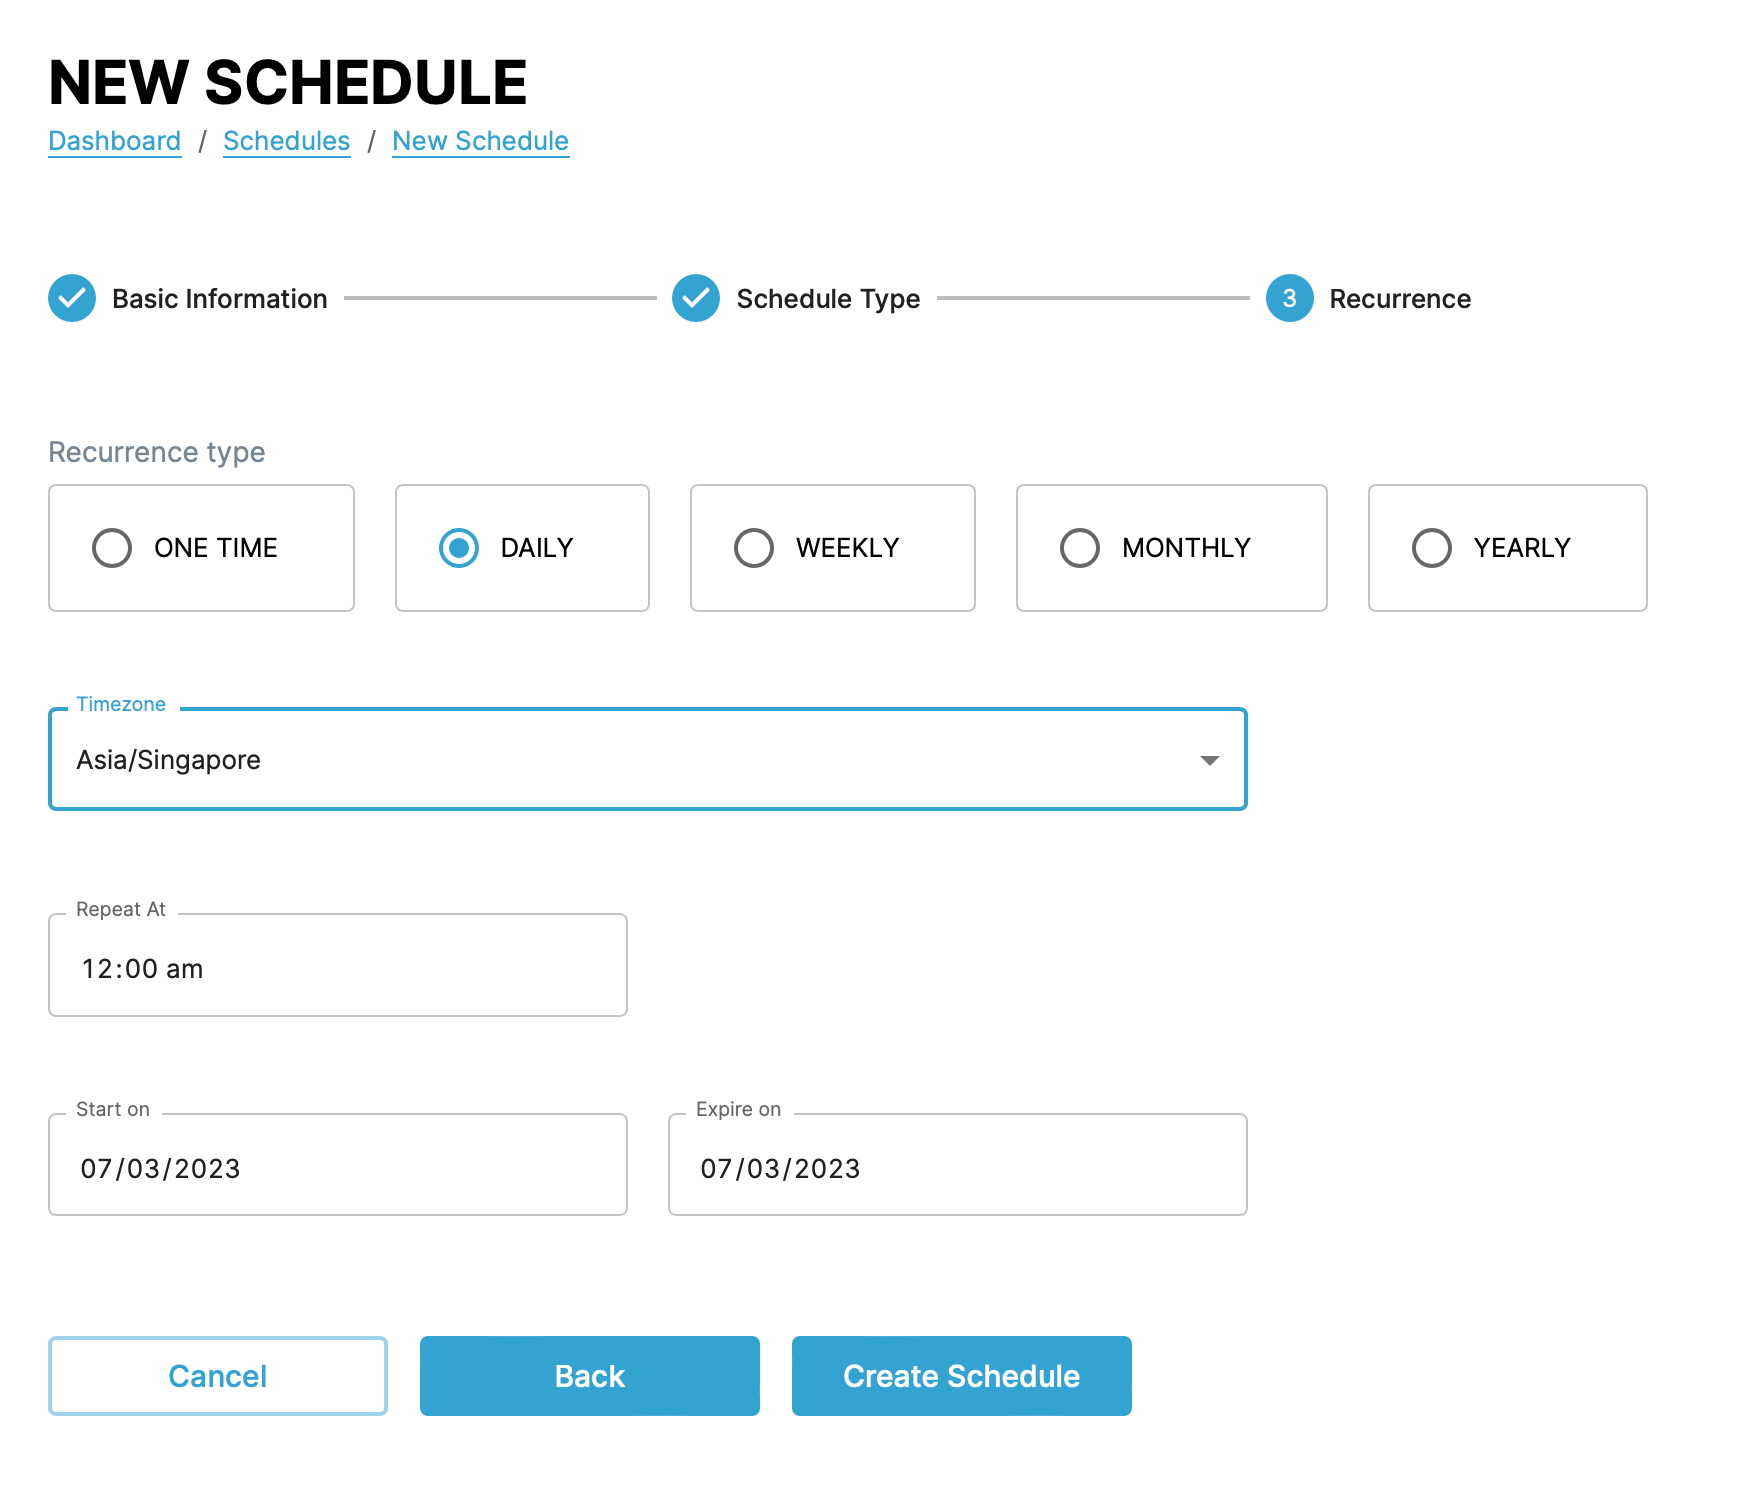
In the final step, set the schedule for the deployment.
Restricted↑
In the first step, give the schedule a name and a description.
In the next step, select the schedule type and the deployments to include in the schedule.
In the final step, set the schedule for the restriction.